Roots Running Out of Pot: How to Repot an Aloe Vera Plant the Right Way
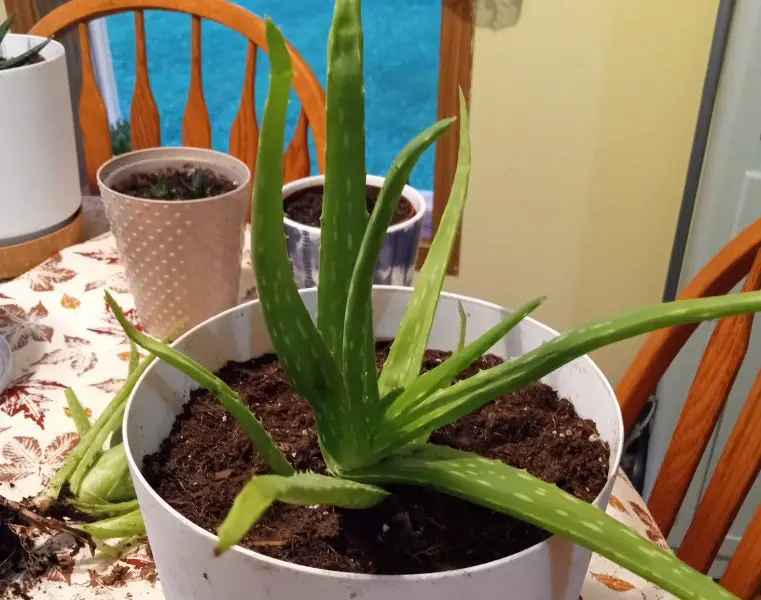
Aloe vera is a resilient plant. It tolerates neglect better than most, asks for very little water, and keeps growing quietly in the corner of your windowsill for months — sometimes years — without complaint.
But every aloe vera plant eventually outgrows its home.
When that happens, repotting is not optional. It is necessary. A plant left too long in a pot that is too small will become stressed, stop growing, and in some cases begin to decline. I have seen beautifully healthy aloe plants turn pale and limp simply because no one thought to give them more space.
This guide covers everything you need to know about repotting aloe vera — why it matters, when to do it, what materials to use, and the exact steps to follow. Whether this is your first time or you want to make sure you are doing it correctly, you will find everything here.
Why Repotting Aloe Vera Matters
Aloe vera grows from a central rosette and produces roots that spread outward and downward. As the plant matures, the root system expands. If the pot cannot accommodate that growth, the roots begin to circle the inside of the container, compress on themselves, or push out through the drainage holes.
This condition is called being “root-bound” or “pot-bound.” It restricts the plant’s ability to absorb water and nutrients effectively. The result is slow growth, yellowing or browning leaf tips, instability in the pot, and sometimes root rot.
Repotting gives the roots room to spread properly, introduces fresh soil with renewed nutrients, and resets the growing environment for another productive season.
It is also the ideal time to separate any offsets — the small pups growing at the base of the plant — and give them their own containers.
When Should You Repot an Aloe Vera Plant?
Timing matters. Repotting at the wrong time — particularly during cold months or during a period of stress — can set the plant back significantly.
Signs That Your Aloe Vera Needs Repotting
You do not need to repot on a fixed schedule. Instead, watch for these clear signals.
- Roots growing out of the drainage holes. This is the most obvious sign. When you can see roots emerging from the bottom of the pot, the plant has used all available space below the soil.
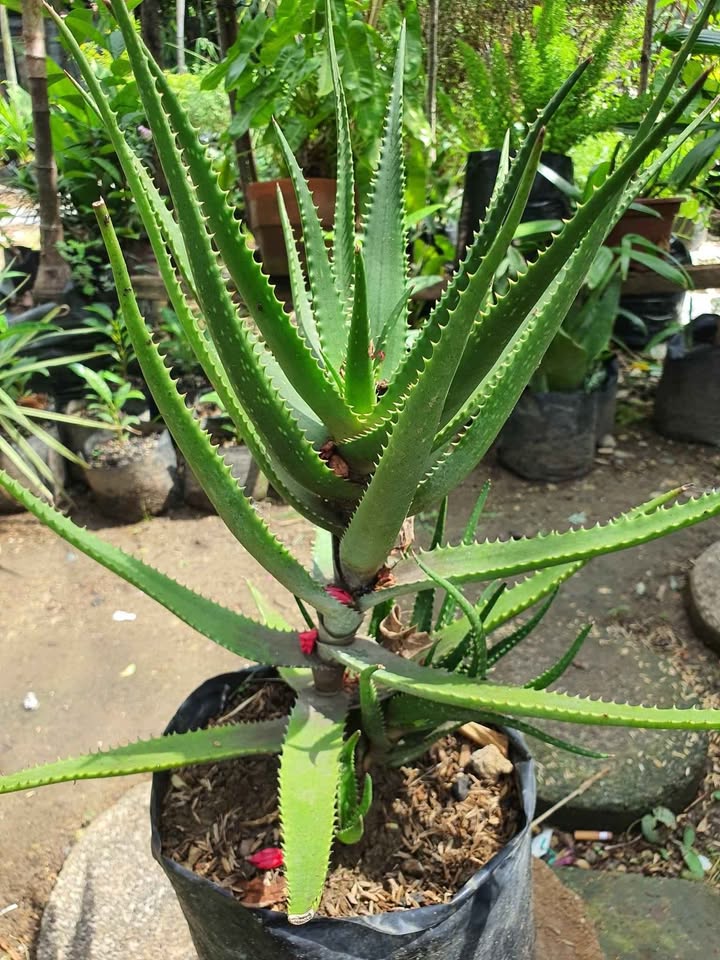
- The plant is top-heavy or tipping over. When the rosette becomes too large and heavy for the pot it is in, the plant will begin to lean or fall sideways. This is a strong indicator that the pot is undersized.
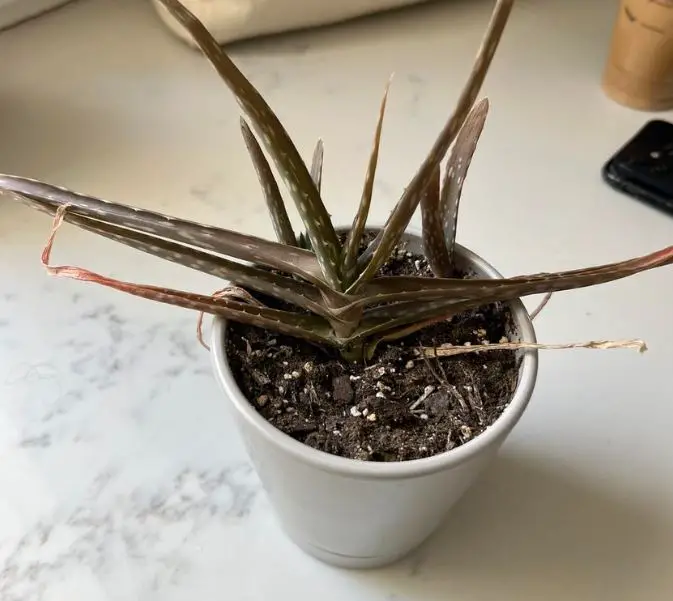
- Leaves are pale, yellowish, or stunted. When growth slows dramatically or the leaves begin to lose their typical firm, green appearance despite good care, it often points to root restriction or depleted soil.
- The soil dries out extremely fast. If you find yourself needing to water far more frequently than usual — because the soil dries within a day or two — the pot may be mostly roots with very little soil left to hold moisture.
- The plant has produced many offsets. Pups growing around the base compete for space and nutrients. When there are several of them crowding the pot, it is time to separate and repot.
The Best Time of Year to Repot
The ideal time to repot aloe vera is in spring or early summer. This is when the plant enters its active growing season. Roots recover more quickly during this period, and the warmer temperatures support healthy establishment.
Avoid repotting in winter if you can. Aloe vera grows slowly during cold months, and disturbing the roots when growth is minimal means a longer recovery period.
If your aloe vera is showing signs of stress — root rot, severe root binding, or pest damage — repot regardless of the season. In urgent situations, the plant’s needs come first.
What You Will Need
Having everything ready before you start makes the process smoother. Gather the following:
- A new pot. Choose one that is two to five centimetres (one to two inches) wider in diameter than the current pot. Going much larger than this is a common mistake — we will explain why shortly.
- Well-draining potting mix. A commercial cactus or succulent mix works well. If you prefer to mix your own, combine two parts regular potting soil with one part coarse sand and one part perlite. This combination drains quickly and does not hold excess moisture.
- A trowel or small hand shovel. Useful for removing soil and manoeuvring roots.
- A sterilised knife or scissors. Needed if you plan to separate offsets or trim any damaged roots.
- Gloves. Aloe vera leaves have fine serrated edges. Wearing gloves protects your hands, especially when working with a large, established plant.
- A clean cloth or newspaper. Spread this on your work surface to make cleanup easier.
- Rubbing alcohol or diluted bleach. For sterilising your cutting tools before use.
Choosing the Right Pot
The pot you choose has a significant effect on the long-term health of your aloe vera. Do not choose simply based on appearance.
Size
Bigger is not better when it comes to aloe vera. A pot that is too large holds far more soil than the root system can absorb water from. That excess moisture sits in the soil and creates the conditions for root rot.
Choose a pot that gives the roots just a little more room than they currently have — roughly two to five centimetres more in diameter. This provides space to grow without creating a waterlogging risk.
Material
Terracotta or unglazed clay pots are the best choice for aloe vera. These materials are porous. They allow moisture to escape through the walls, which helps the soil dry out more evenly and reduces the risk of rot.
Plastic pots retain moisture longer. They can work, but they require more careful watering habits. If you use plastic, make sure it has several large drainage holes.
Avoid decorative pots with no drainage hole entirely. Water with no escape route will pool at the bottom and rot the roots. If you love the look of a particular decorative pot, use it as a cachepot — place the growing pot inside it and remove the inner pot for watering.
Depth vs. Width
Aloe vera has a shallow but wide root system. A wide, shallow pot suits it better than a deep, narrow one. This allows the roots to spread naturally in the direction they prefer.
How to Repot an Aloe Vera Plant: Step-by-Step
Now for the main process. Follow these steps carefully and take your time at each stage.
Step 1: Stop Watering Two to Three Days Before Repotting
Water the plant slightly drier than usual before you begin. Dry soil holds together better and pulls away from the pot more cleanly. It is also easier to work with and less likely to compact tightly around the roots.
If the soil is very wet at repotting time, the weight and moisture increase the risk of root damage during removal.
Step 2: Prepare Your New Pot
Before removing the plant from its current container, set up the new pot.
Add a layer of fresh potting mix to the bottom of the new pot — enough that when you place the aloe vera inside, the base of the rosette will sit about two centimetres below the rim of the pot. This gives you space to add soil around the roots without mounding it against the leaves.
Do not cover the drainage holes. Some gardeners place a piece of mesh screen or broken pottery shards over the holes to prevent soil from washing out while still allowing water to drain freely.
Step 3: Remove the Aloe Vera from Its Current Pot
Tip the pot gently onto its side. Support the plant with one hand while using the other to squeeze the sides of the pot gently (if it is flexible plastic) or to run a trowel around the inside edge (if it is rigid terracotta or clay).
Never pull the plant out by its leaves. This can tear the leaves at the base or damage the central growing point. Instead, coax the root ball out by tilting and gently tapping the base of the pot.
If the plant is particularly stubborn, run a thin trowel or butter knife around the inside perimeter to loosen the soil from the walls of the pot. Work slowly and patiently.
Step 4: Inspect and Clean the Root System
Once the plant is out, shake off the excess soil gently. You do not need to remove every trace of soil — just enough to examine the roots clearly.
Look carefully at the roots. Healthy roots are firm and whitish or light tan in colour. They should feel solid between your fingers.
Identify and remove any damaged roots. Roots that are black, very dark brown, mushy, or have an unpleasant smell are rotten. Use your sterilised scissors or knife to cut them away cleanly, cutting back to healthy tissue.
Slightly dry or withered roots that are not rotten can often recover once replanted in fresh soil with proper watering.
Allow any cuts to dry briefly — about fifteen to twenty minutes — before planting. This reduces the chance of infection entering the fresh cuts.
Step 5: Separate Offsets If Present
This is the ideal time to remove any pups that have grown around the base of the mother plant.
Look for small rosettes attached to the roots or base stem of the mother plant. Use your sterilised knife to cut each pup free, keeping as much root material attached to the pup as possible.
Set the pups aside to callous for one to two days before potting them separately. If you plant them immediately after cutting, the fresh wound is more vulnerable to rot.
For full instructions on potting pups, refer to a dedicated propagation guide.
Step 6: Place the Plant in Its New Pot
Lower the aloe vera into the new pot, positioning it centrally. The base of the rosette — where the leaves emerge from — should sit just at or slightly above the soil surface. Do not bury the lower leaves.
Hold the plant upright with one hand and use your other hand to fill in fresh potting mix around the roots. Press it down gently but firmly as you go, eliminating large air pockets.
Do not pack the soil too tightly. Aloe vera roots need some air circulation in the soil. Light firmness is all that is needed to stabilise the plant.
Fill to about two centimetres below the rim of the pot to allow room for watering without overflow.
Step 7: Settle the Soil
Once the pot is filled, tap it gently on your work surface two or three times. This helps the soil settle naturally around the roots without you needing to compress it further by hand.
You may notice the soil level drops slightly after settling. Top it up with a little extra mix if needed.
Step 8: Do Not Water Immediately
This is perhaps the most important step, and the one most often ignored.
Wait at least three to five days before watering after repotting. During this period, any minor root damage from the repotting process has time to heal. Introducing water too soon can cause those small wounds to rot.
The aloe vera will not suffer from this short wait. Remember, it is a succulent. It carries water reserves in its leaves.
When you do water for the first time after repotting, water thoroughly — until water runs freely from the drainage holes. Then allow the soil to dry out completely before watering again.

Aftercare: The First Few Weeks After Repotting
The first month after repotting is a critical period. Here is how to care for your plant during this time.
Light
Place the repotted aloe vera in bright, indirect light. Avoid intense direct sunlight for the first two to three weeks. The plant is adjusting to its new environment, and harsh sun can stress it further during this period.
A north or east-facing windowsill, or a spot slightly back from a south or west-facing window, works well.
After the plant has settled — usually within three to four weeks — you can gradually reintroduce it to more direct sunlight.
Watering
Continue the same conservative approach you started with. Water only when the soil has completely dried out. Stick your finger two centimetres into the soil — if it still feels even slightly cool or moist, wait.
During the establishment phase, it is far better to underwater slightly than to overwater.
Temperature
Keep the plant in a warm environment. The ideal range is between 15°C and 27°C (60°F to 80°F). Avoid placing it near cold drafts, air conditioning vents, or windows that lose heat rapidly at night during winter.
Fertilising
Do not fertilise immediately after repotting. Fresh potting mix contains nutrients that the plant does not need supplementing for at least two months. Adding fertiliser too soon can cause nutrient burn on newly forming roots.
Once the plant has fully settled and is showing new growth, you can apply a diluted succulent fertiliser once per month during the growing season. In autumn and winter, stop fertilising entirely.
Common Mistakes People Make When Repotting Aloe Vera
Even careful gardeners make avoidable errors. Here are the most frequent ones.
- Using a pot that is too large. As discussed, oversized pots hold too much moisture. Stick to just one size up from the current container.
- Using standard garden soil or compost. These retain moisture far too well for aloe vera. Always use a mix designed for succulents or add significant drainage material to regular soil.
- Burying the rosette too deeply. If soil covers the lower leaves or packs around the base of the rosette, moisture accumulates there and causes rot at the plant’s most vulnerable point.
- Watering immediately after repotting. This mistake is extremely common and frequently leads to root rot. Always wait several days first.
- Repotting during winter without good reason. Unless the plant is in distress, repotting during slow growth months means a longer, harder recovery.
- Failing to sterilise tools. Using dirty scissors or a knife can introduce fungal or bacterial pathogens directly into fresh cuts. Always sterilise before use.
What to Do If Your Aloe Vera Shows Stress After Repotting
Some transplant stress is normal. The plant may look slightly less perky for a week or two as it adjusts. This is not cause for alarm.
Signs of normal, temporary stress include slight wrinkling of the leaves, a brief pause in new growth, and leaves that appear a little less vibrant than usual. These should resolve within two to four weeks.
Signs of a more serious problem include:
- Leaves turning mushy or translucent, especially near the base — this suggests root rot
- Leaves shrivelling significantly and not recovering after careful watering — this may indicate root damage during repotting
- A foul smell from the soil — this is a strong sign of rot
If root rot is suspected, act quickly. Remove the plant from the pot, cut away all rotten root material, let the remaining roots dry for a day, and replant in fresh, dry soil. This process is essentially another repotting, and when done promptly, it can save the plant.
How Often Should You Repot Aloe Vera?
Most aloe vera plants need repotting every two to three years. Younger, faster-growing plants may need it slightly more often. Mature plants that have slowed their growth may go three to four years between repottings.
Do not repot on a schedule alone. Let the plant tell you when it needs more space. The signs described earlier in this article — roots emerging from the drainage holes, top-heaviness, rapid soil drying — are your most reliable indicators.
If you repot and the plant seems comfortable, there is no reason to disturb it again until those signs reappear.
Suggested For You:
Is Aloe Vera Plant Toxic to Cats? The Risks and Precautions
Overwatered Aloe Vera Plant: How to Spot It, Save It, and Never Make the Same Mistake Again
Sunburnt Aloe Vera Plant: How to Recognize Sun Damage, Treat and Protect Your Plant Going Forward
Repotting an Aloe Vera That Has Root Rot
Root rot deserves its own section because it is both very common and very fixable if caught early.
Root rot is caused by prolonged exposure of the roots to wet soil. The most common cause is overwatering — either too frequent or in pots with poor drainage.
To treat root rot through repotting:
Remove the plant from its pot as gently as possible. Shake off all the old soil — every bit of it. Lay the root ball out and examine it closely.
Cut away every section of root that is dark, soft, or smells unpleasant. Use a sterilised knife and work methodically. When in doubt, cut it out. Leaving even a small section of rot can spread it to the healthy roots.
Allow the trimmed root system to dry in a shaded, well-ventilated area for twenty-four hours.
Repot into fresh, dry succulent mix in a clean pot. Do not reuse the old pot without washing it thoroughly — old pots can harbour the pathogens that caused the rot.
Wait five days before the first watering. Then begin a much more conservative watering routine going forward.
A Quick Summary of Key Points
To bring everything together, here are the most important points to remember:
- Repot when you see clear signs of root binding, not on a fixed schedule. Spring is the best time of year to do it.
- Choose a new pot that is only slightly larger than the current one, with drainage holes, ideally terracotta.
- Use well-draining soil. A commercial succulent mix or a homemade blend with perlite and coarse sand is best.
- Never bury the rosette. The base of the leaves should sit at or just above the soil surface.
- Do not water for three to five days after repotting. Let the roots heal first.
- Avoid direct intense sunlight for the first few weeks after repotting.
Final Thoughts
Repotting an aloe vera plant is not complicated, but the details matter. The right pot size, the right soil, and the patience to wait before watering are what separate a successful repot from a frustrating failure.
I find the whole process quite meditative, actually. There is something satisfying about carefully lifting a plant from its cramped container, cleaning the roots, and giving it a fresh start in space it can truly grow into. Within a few weeks, you can usually see new leaves emerging from the centre — and that visible progress makes every effort worthwhile.
Take your time, respect the plant’s needs, and it will reward you with healthy, steady growth for years to come.
References
- University of Florida IFAS Extension — Container Gardens for Indoor and Outdoor Use https://edis.ifas.ufl.edu/publication/EP055
- Clemson University Cooperative Extension — Aloe vera Indoors https://hgic.clemson.edu/factsheet/aloe-vera/
- North Carolina State University Extension — Aloe vera: Plant Care and Growing Guide https://plants.ces.ncsu.edu/plants/aloe-vera/
- University of California Agriculture and Natural Resources — Drought-Tolerant Plants and Container Growing Practices https://ucanr.edu/sites/nm_uc_master_gardeners/files/186534.pdf
- Purdue University Extension — Department of Horticulture — Indoor Plant Care: Repotting and Soil Requirements for Succulents https://www.extension.purdue.edu/extmedia/HO/HO-221-W.pdf
Tim M Dave is a gardening expert with a passion for houseplants, particularly cacti and succulents. With a degree in plant biology from the University of California, Berkeley, he has vast experience in gardening. Over the years, he has cultivated a vast collection of desert plants and learned a great deal about how to grow and care for these unique companions.