Overwatered Aloe Vera Plant: How to Spot It, Save It, and Never Make the Same Mistake Again
Aloe vera is one of the most forgiving plants you can own. It survives neglect, tolerates dry indoor air, and asks for very little in return. Yet, year after year, more aloe vera plants die from too much water than from any other cause.
The irony is real. People water their aloe with the best intentions — caring for it, nurturing it — and in doing so, they slowly kill it.
If your aloe vera is looking soft, yellow, mushy, or just generally unwell, overwatering is the most likely explanation. This guide will walk you through everything you need to know: how to recognize overwatering, why it causes so much damage, how to rescue a plant that is already suffering, and how to water correctly going forward.
Why Overwatering Is So Dangerous for Aloe Vera
To understand why overwatering is so destructive, you need to understand what aloe vera is.
Aloe vera is a succulent — a plant that has evolved to store water inside its fleshy leaves. In its native habitat, which includes the Arabian Peninsula and the dry regions of North Africa, it grows in rocky, fast-draining soils and survives long periods of drought. Rainfall is infrequent but sometimes heavy. The plant is designed to absorb water quickly, store it, and then live off those reserves for weeks.
When you water an aloe vera the way you would water a fern or a tomato plant, you are giving it far more water than its system was designed to handle. The soil stays wet for too long. The roots sit in moisture. Oxygen cannot reach them. Root cells begin to break down.
Then comes root rot — a fungal condition that spreads through the root system and begins moving up into the base of the plant. By the time the leaves show visible signs of distress, the roots may already be extensively damaged.This is what makes overwatering so difficult to deal with. The damage is hidden underground long before you see it above the soil.
Signs of an Overwatered Aloe Vera Plant
Knowing the symptoms early can be the difference between a plant that recovers and one that is lost. Here are the key signs to watch for.
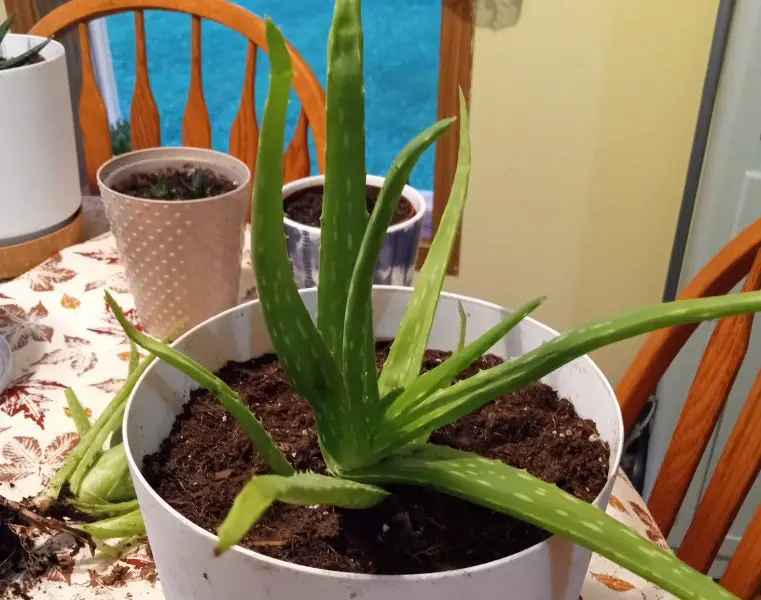
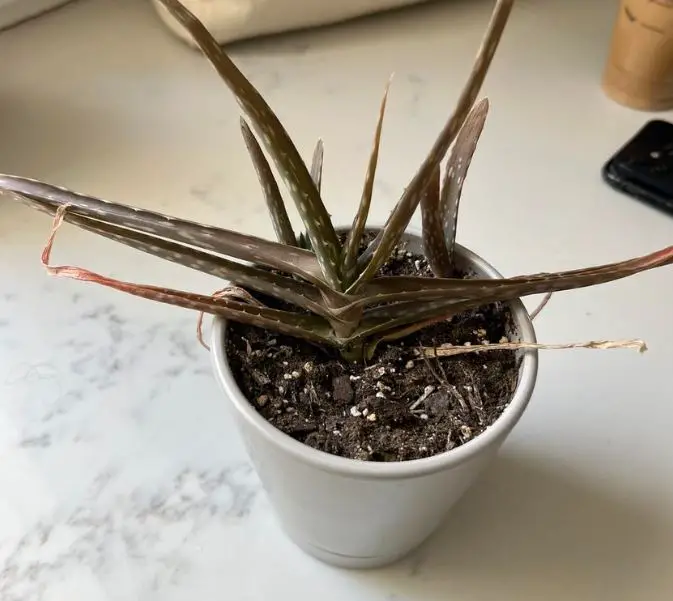
1. Soft, Mushy, or Translucent Leaves
Healthy aloe vera leaves are firm. They feel solid when you gently press them because they are full of stored water and gel.
When the leaves feel soft, limp, or squishy, that is a serious warning sign. Translucent patches — areas where the leaf appears almost water-logged and glass-like — are even more concerning. This happens when leaf cells have absorbed so much external moisture that they begin to break down from within.
This symptom is frequently confused with underwatering, but there is a key difference: underwatered leaves wrinkle and shrivel. Overwatered leaves become soft and mushy, not wrinkled.
2. Yellow or Brown Leaves
Yellowing is one of the most common early signs. The leaves lose their healthy green color and take on a pale, washed-out yellow appearance, often starting from the base of the plant and working upward.
Brown leaves can indicate either the later stages of overwatering or root rot that has already set in. If the browning starts at the base of the leaf near the soil line and the affected tissue is soft and wet-feeling, root rot is likely involved.
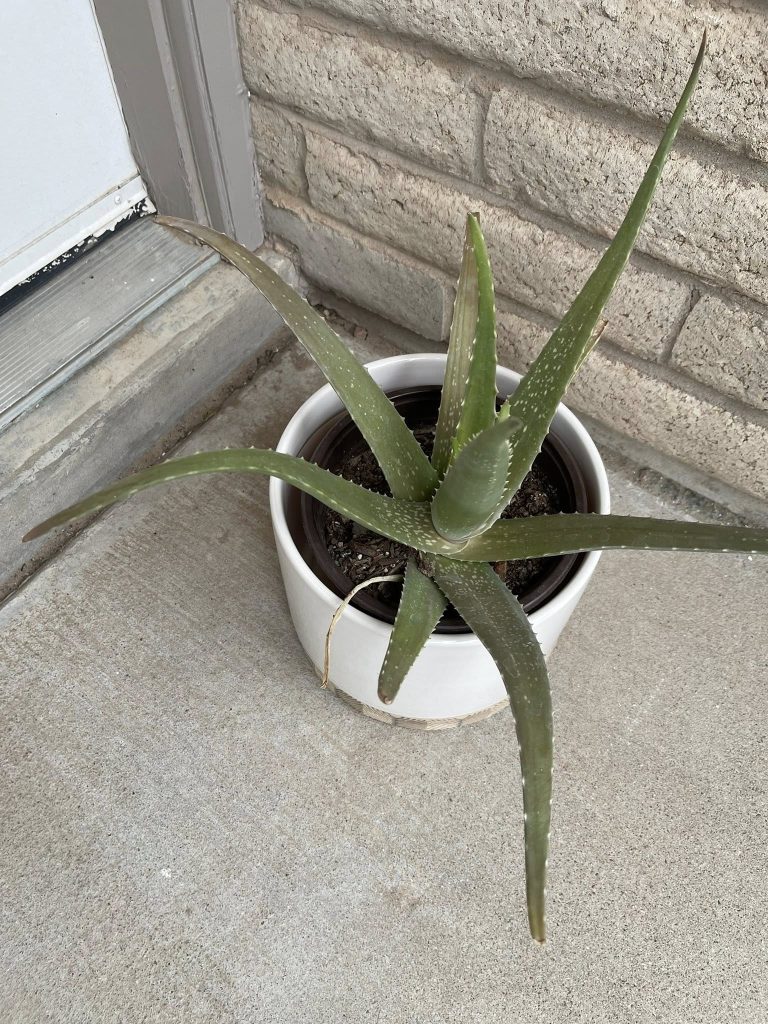
3. Leaves Drooping or Falling Over
The leaves of a healthy aloe stand upright or at a gentle outward angle. Overwatered leaves droop, sag, and can collapse outward or downward.
This happens because the structural integrity of the leaf tissue has been compromised. The cells that should hold the leaf firm and upright have been damaged by excess moisture, and the leaf simply cannot support itself anymore.
4. Brown, Mushy Base or Stem
This is one of the most alarming signs — and one that requires immediate action. If the base of the plant (the stem or crown, just above the soil) feels soft, wet, and brown, root rot has likely spread above the root zone.
Press gently at the base of the plant with your fingers. A firm, solid base is healthy. A soft, yielding, or discolored base means the tissue is rotting.
5. Foul Smell From the Soil
Healthy soil has a neutral, earthy smell. If your pot smells sour, swampy, or unpleasant when you put your nose near the soil surface, that is a sign of anaerobic bacterial activity — meaning the soil is staying too wet and is lacking proper oxygen. Root rot and bacterial decay produce this characteristic odor.
6. Soil That Stays Wet for Too Long
This one is not about the plant itself — it is about the growing medium. After watering, healthy succulent soil should dry out within a few days. If your soil is still visibly moist or feels wet to the touch a week after watering, your drainage is inadequate or you are watering too frequently.
Push your finger one to two inches into the soil. If it feels wet or cool and damp at that depth, do not water yet.
7. Mold or Algae on Soil Surface
Visible white fuzz, green algae, or mold growing on the top layer of soil is a direct indicator of persistently excessive moisture. While mold on the surface does not automatically mean the plant is dying, it is a clear signal that conditions are too wet and need to change immediately.
8. Root System That Is Black, Brown, or Mushy
If you have removed the plant from its pot (which you should do if you suspect overwatering), healthy roots appear white or light tan and feel firm. Roots affected by root rot are dark brown or black, soft, and may fall apart when touched. They may also smell unpleasant.
If you see this, prompt action is required.
What Happens Underground: Root Rot Explained
Root rot is the direct consequence of prolonged overwatering, and it is worth understanding how it works.
When soil stays saturated with water, the air pockets in the soil — which roots depend on for oxygen — become filled with water instead. Roots begin to suffocate. Weakened, oxygen-starved root tissue becomes vulnerable to fungal pathogens, particularly Phytophthora species and Pythium species, which thrive in wet, anaerobic conditions.
These fungi attack the root tissue directly, breaking it down and spreading both through the soil and upward into the plant. The infected roots can no longer absorb water or nutrients, even if the soil is full of both. The plant essentially starves and suffocates simultaneously.
The cruel paradox is this: the symptoms of root rot in aloe vera — wilting, softness, yellowing — look very similar to the symptoms of drought stress. An inexperienced grower might look at a wilting, yellowing aloe and water it more. This makes the problem dramatically worse.
How to Save an Overwatered Aloe Vera Plant
The good news is that aloe vera can be saved from overwatering — even from moderate root rot — if you act promptly and correctly. Here is a step-by-step rescue process.
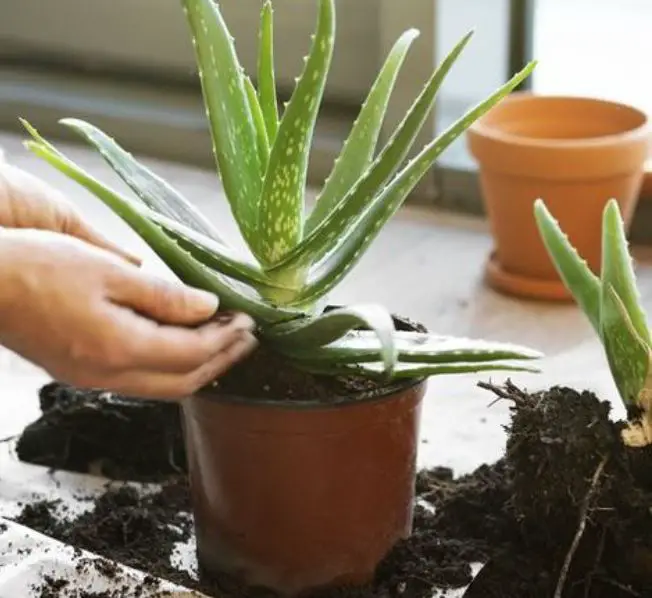
Step 1: Remove the Plant From Its Pot
Take the aloe vera out of its container entirely. Be gentle but thorough — you need to be able to see and access the root system.
Shake or brush off as much of the old, wet soil as you can. You want to be able to inspect the roots clearly.
Step 2: Inspect the Roots
Examine every root carefully.
Healthy roots: Firm, white or light tan in color, and intact.
Rotted roots: Dark brown or black, soft, mushy, and may break apart easily. They may smell bad.
If you see rotted roots, do not panic. Many plants can be saved even when a significant portion of the root system is damaged, provided the crown and base of the plant are still firm and healthy.
Step 3: Prune Away All Rotted Roots
Using clean, sharp scissors or pruning shears — sterilized with rubbing alcohol before use — cut away every single rotted root. Do not leave any damaged material behind, as it will continue to spread.
Cut back to clean, healthy tissue. If a root looks questionable, remove it. It is better to leave fewer healthy roots than to keep any compromised ones.
Step 4: Allow the Roots to Dry
After pruning, allow the root system to air dry for at least 24 to 48 hours before repotting. Place the plant somewhere dry, shaded, and with good air circulation.
This step is important. It allows the cut ends to callous over, which reduces the risk of reinfection. Some growers dust the cut root ends with powdered cinnamon or sulfur powder, both of which have mild antifungal properties.
Step 5: Prepare a New Pot With Fresh, Well-Draining Soil
Do not put the plant back into the same pot with the same soil. The old soil likely harbors fungal spores and pathogens that caused or worsened the root rot.
Choose a clean pot — ideally terracotta or unglazed ceramic, which allows moisture to evaporate through the walls. The pot must have drainage holes. Never use a pot without drainage for aloe vera.
Fill it with a commercial cactus and succulent mix, or make your own by combining regular potting soil with coarse sand or perlite in roughly a 50:50 ratio.
Step 6: Repot and Wait
Place the aloe in the new pot and fill in around the roots with the fresh soil mix. Do not water immediately. Wait at least 3 to 5 days — some experts recommend waiting a full week.
This dry period allows any remaining minor root damage to heal and reduces the immediate risk of reinfection.
Step 7: Resume Careful, Minimal Watering
When you do water for the first time after repotting, water lightly. Then wait until the soil is completely dry before watering again. Follow the correct watering protocol described in the next section from this point forward.
What if the Base Is Already Rotting?
If the stem base or crown of the plant is already soft and mushy, the situation is more serious. However, it is not always hopeless.
Examine how far the rot has spread. If only the very base is affected but the upper stem and leaf rosette are still firm and healthy, you may be able to propagate the healthy portion.
Cut away the rotted base cleanly with a sterilized blade. Keep cutting until you reach only firm, healthy, white or green tissue. Allow the cut end to dry and callous for at least 48 hours. Then plant the healthy portion in fresh, dry succulent soil as you would a cutting.
This is essentially starting over with the healthy part of the plant, and it works more often than you might expect. Aloe vera is resilient.
How to Water Aloe Vera Correctly
Once you have saved your plant — or if you are reading this to prevent problems before they start — here is how to water aloe vera properly.
The “Soak and Dry” Method
This is the gold standard for watering aloe vera and most succulents. Water the plant thoroughly — deeply enough that water flows out of the drainage holes. Then leave it alone completely until the soil has dried out entirely.
Do not check it daily. Do not water “just a little” in between. Let the soil dry out completely, then water deeply again.
How Often Should You Water?
The honest answer is: it depends on your environment. There is no universal schedule.
A general guide:
- Summer: Every 2 to 3 weeks, depending on heat and light levels.
- Winter: Every 4 to 6 weeks. Aloe vera goes into a semi-dormant state in cooler temperatures and needs very little water.
- Indoors (low light): Less frequently than outdoors in full sun.
The best guide is always the soil, not the calendar. Check the soil with your finger before every single watering. If there is any moisture at depth, wait.
The Finger Test
Push your index finger about two inches into the soil. If it feels dry at that depth, you can water. If it feels at all damp or cool, wait another few days and check again.
For extra certainty, a wooden chopstick inserted into the soil works like a cake tester. Pull it out — if dry, clean, and with no soil sticking to it, the soil is dry enough to water.
Water Quality Matters
Hard tap water with high fluoride or salt content can build up in the soil over time and cause leaf tip browning — a symptom sometimes confused with other issues. Using filtered water or rainwater is ideal for aloe vera. If tap water is your only option, letting it sit in an open container for 24 hours allows some of the chlorine to dissipate.
Common Mistakes That Lead to Overwatering
Understanding what drives overwatering can help you avoid it.
Watering on a fixed schedule is one of the biggest mistakes. Many people water every Sunday regardless of what the soil is doing. Seasons change, temperatures change, and light levels change — your watering should change with them.
Using the wrong soil is another frequent problem. Regular potting soil retains too much moisture for aloe vera. It stays wet far too long after watering, and roots never get a chance to dry out.
Pots without drainage holes guarantee overwatering problems eventually. Excess water has nowhere to go, and it accumulates at the bottom of the pot — exactly where the roots are.
Decorative pots and cache pots — the attractive outer containers people use to hide plain nursery pots — can trap water in the outer pot, allowing the inner pot to sit in standing water. Always empty cache pots after watering.
Misreading stress signals is perhaps the most heartbreaking mistake. A struggling aloe that is yellowing and soft often gets watered more by a concerned owner. If root rot is the cause, this is fatal.
Preventing Overwatering: The Right Setup From the Start
Prevention is always easier than rescue. Here is how to set up your aloe vera for success.
- Choose a terracotta or unglazed clay pot with drainage holes. These materials allow moisture to evaporate through the walls, reducing the risk of soil staying too wet.
- Use a proper succulent soil mix. Commercial cactus and succulent mixes are widely available and suitable. You can improve them further by adding 30 to 50% perlite for even better drainage.
- Elevate the pot slightly if placing it on a saucer, so the drainage hole does not sit in standing water.
- Place the plant in bright light. More light means faster soil drying and healthier roots overall.
- Reduce watering significantly in winter, even if the plant is indoors in a heated room. Aloe vera’s water needs drop substantially in lower light and cooler temperatures.
A Note on Distinguishing Overwatering From Underwatering
Because the two problems can look similar, it is worth clarifying the key differences side by side.
| Symptom | Overwatering | Underwatering |
| Leaf texture | Soft, mushy, squishy | Thin, wrinkled, shriveled |
| Leaf color | Yellow, pale, or brown | Dry brown at tips |
| Soil condition | Wet or persistently damp | Bone dry, pulling away from pot edges |
| Root condition | Dark, soft, possibly rotten | Dry but intact |
| Smell | Sour or unpleasant | Neutral |
| Base of plant | May feel soft | Firm |
When in doubt, always check the soil before assuming the plant needs water. The finger test takes three seconds and removes all guesswork.
How Long Does Recovery Take?
With proper treatment — pruning, fresh soil, correct watering going forward — a mildly overwatered aloe vera can recover within a few weeks. You will notice the leaves firming up, regaining their green color, and new growth beginning to appear.
Severely overwatered plants with extensive root rot take longer — sometimes two to three months — and may not fully recover if the base has been compromised. Some leaves that have yellowed may not return to full green and can be removed once they have dried.
Be patient. Aloe vera is tougher than it looks.
Suggested For You:
Roots Running Out of Pot: How to Repot an Aloe Vera Plant the Right Way
From One Plant to Many: How to Propagate Aloe Vera Successfully
25 Types of Aloe Plants: Identification and Growing Guide
Final Thoughts
I have seen beautifully healthy aloe vera plants turned into soft, yellowing, half-dead specimens within a matter of weeks — purely because of too much water. It is such an avoidable situation, which is what makes it frustrating to witness.
The key lesson is this: aloe vera needs far less water than most people think. When in doubt, do not water. Wait another week. The plant can handle the wait far better than it can handle excess moisture.
Follow the soak-and-dry method. Use the right soil. Choose a pot with good drainage. And check the soil with your finger before every single watering. Do those four things consistently, and your aloe vera will thrive for years with minimal attention.
That, ultimately, is the kind of plant aloe vera is designed to be.
References
- University of Florida IFAS Extension – Aloe vera (Aloe barbadensis Miller) https://edis.ifas.ufl.edu/publication/FP009
- University of California Agriculture and Natural Resources – Irrigation of Succulent Plants https://ucanr.edu/sites/scmg/files/30917.pdf
- Cornell University Cooperative Extension – Root Rot of Houseplants: Diagnosis and Management https://gardening.cornell.edu/homegardening/scene31af.html
- North Carolina State University Extension – Aloe vera Plant Care and Problem Diagnosis https://plants.ces.ncsu.edu/plants/aloe-vera/
- Arizona Cooperative Extension, University of Arizona – Succulents: Culture and Care in Arid Environments https://extension.arizona.edu/sites/extension.arizona.edu/files/pubs/az1483.pdf
Tim M Dave is a gardening expert with a passion for houseplants, particularly cacti and succulents. With a degree in plant biology from the University of California, Berkeley, he has vast experience in gardening. Over the years, he has cultivated a vast collection of desert plants and learned a great deal about how to grow and care for these unique companions.