From One Plant to Many: How to Propagate Aloe Vera Successfully
Aloe vera is one of the most forgiving and rewarding plants you can grow at home. Whether you are a first-time gardener or someone who has kept houseplants for years, propagating aloe vera is a skill worth learning. It costs nothing, produces new healthy plants, and helps you share the joy of growing with others.
I remember the first time I tried to propagate my aloe. I had no idea what I was doing, and I ended up overwatering a perfectly good offset. But once I understood the process, it became one of the simplest tasks in my garden routine.
This guide will walk you through everything — from the biology behind propagation to the exact steps for each method. By the end, you will know how to do it right, every single time.
What Does “Propagating Aloe Vera” Mean?
Propagation is the process of creating a new plant from an existing one. With aloe vera, this is done without seeds in most home-growing situations. Instead, the plant itself produces natural structures you can use to grow new specimens.
Aloe vera (Aloe barbadensis miller) belongs to the Asphodelaceae family. It is a succulent, which means it stores water in its thick leaves. This storage ability also makes it quite hardy — and much more tolerant of beginner mistakes.
The three most common propagation methods are:
- Using offsets (also called “pups”)
- Using stem cuttings
- Using leaf cuttings (less reliable, but possible)
Each method has its own steps, success rate, and ideal use cases. We will cover all three in detail.
Why Propagate Aloe Vera?
Before getting into the how, it helps to understand the why. There are several good reasons to propagate your aloe vera plant.
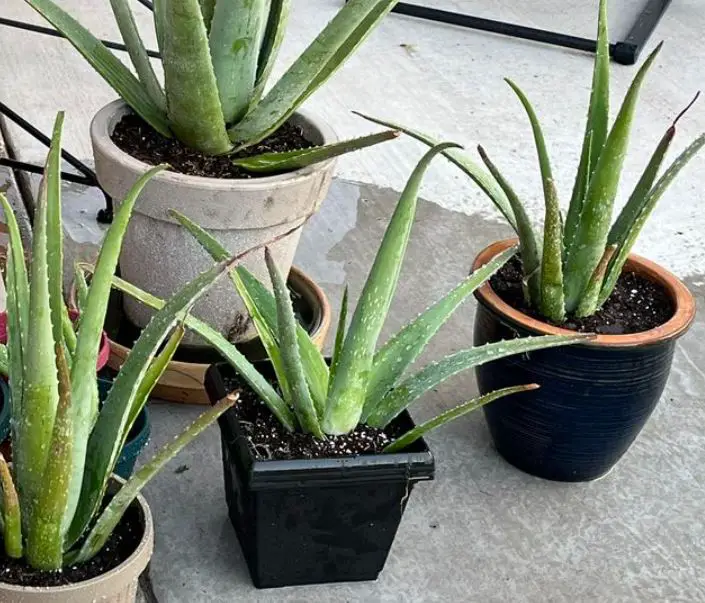
First, it prevents overcrowding. Aloe vera produces offsets naturally, and if you leave them too long, they compete with the mother plant for nutrients and space in the pot.
Second, it saves money. Buying aloe vera plants at a nursery adds up. Propagating from an existing plant is completely free.
Third, it is a wonderful way to share plants with neighbours, friends, or family. Many gardeners pass along aloe pups as small gifts — a tradition I personally find quite meaningful.
Finally, propagating regularly keeps your original plant healthier. Removing pups reduces stress on the mother plant and allows it to direct its energy toward its own growth.
Understanding Aloe Vera’s Growth Structure
To propagate aloe vera successfully, it helps to understand how the plant grows.
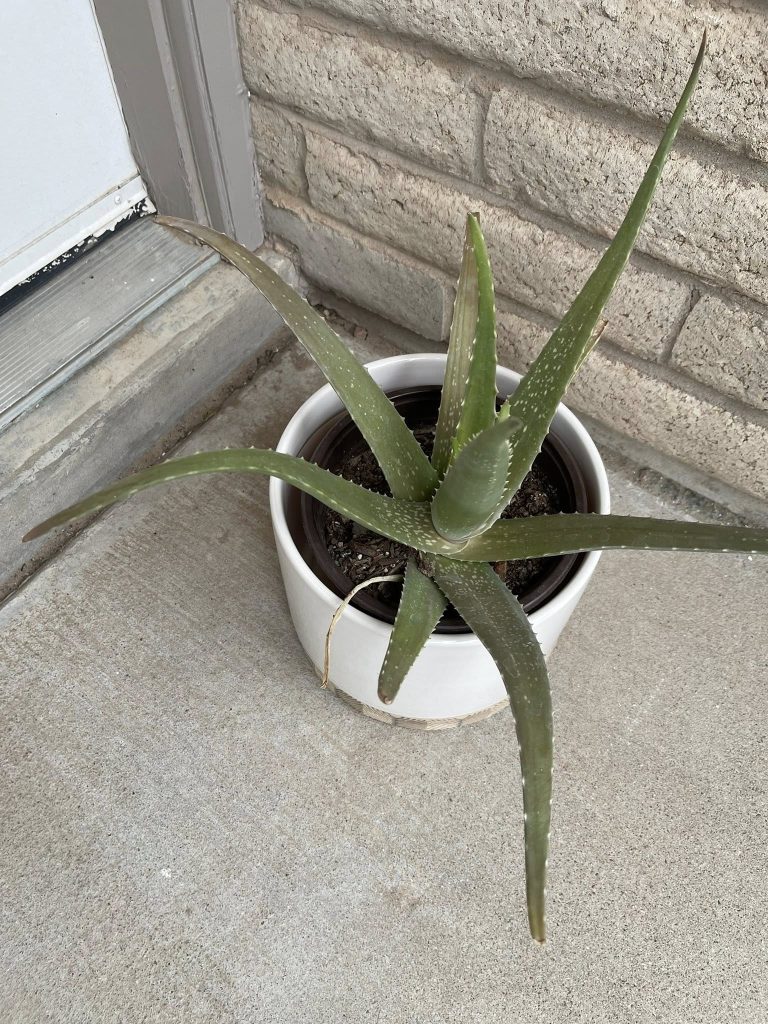
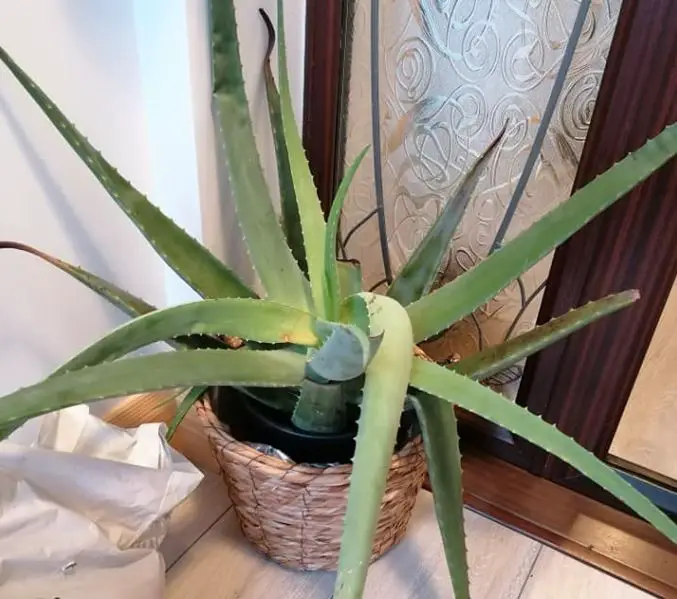
Aloe vera grows in a rosette pattern. Leaves emerge from a central point and fan outward in a circular arrangement. The plant produces new growth from the base, where roots and offsets form close to the soil level.
The root system of a mature aloe vera is fairly shallow but wide. This is why wide, shallow pots work better than deep, narrow ones.
Aloe vera does not propagate well from a single leaf. Unlike some succulents such as jade or echeveria, aloe leaves rarely develop roots even when placed in soil. They usually rot before any roots appear. The methods that work consistently involve offsets or rooted stem sections.
Method 1: Propagating Aloe Vera Using Offsets (Pups)
This is the most reliable and recommended method for propagating aloe vera. Offsets are small plantlets that grow from the base or roots of the mother plant. They are genetically identical to the parent plant and already have the beginnings of their own root systems.
Step 1: Identify a Suitable Offset
Look around the base of your aloe plant. You will likely see smaller rosettes growing close to the soil. Choose an offset that is at least one-fifth the size of the mother plant, ideally with at least four to six leaves. Offsets that are too small struggle to survive on their own.
Avoid using very tiny pups that are still heavily attached without visible roots. Give them more time to develop before separating.
Step 2: Prepare Your Tools
You will need a sharp, clean knife or pair of garden scissors. Always sterilise your cutting tool before use. Wipe the blade with rubbing alcohol or dip it briefly in a diluted bleach solution. This prevents fungal and bacterial infections from entering the cut surface.
Also prepare your new pot and potting mix before you begin. You do not want the roots exposed to air for longer than necessary.
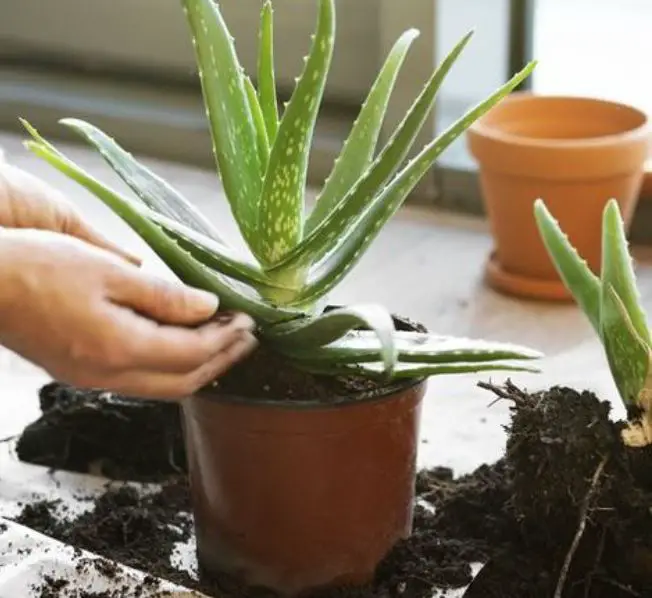
Step 3: Remove the Mother Plant from Its Pot
Gently tip the pot sideways and slide the plant out. Shake off excess soil carefully to expose the root system. Work slowly to avoid damaging the roots of either the mother plant or the pup.
If the pot is large or the plant is firmly rooted, use a trowel to loosen the soil around the edges first. Never yank the plant out by its leaves.
Step 4: Separate the Offset
Once you can see where the pup connects to the mother plant, use your sterilised knife to cut it free. Cut as close to the main stem as possible, leaving as much root material attached to the pup as you can.
Some pups will already be loosely attached and may separate with a gentle twist. If the connection feels firm, always use a knife rather than forcing it apart by hand.
Step 5: Allow the Cut to Callous
This step is one that many beginners skip — and it is often the reason their propagation fails.
Leave the cut end of the offset exposed to air for one to three days. Place it in a dry, shaded spot. During this time, the wound will form a dry, sealed layer called a callous. This protective layer significantly reduces the risk of rot when the pup is planted.
Do not rush this step. A properly calloused cut is far less likely to fail.
Step 6: Plant the Offset
Use a well-draining succulent or cactus potting mix. If using regular potting soil, mix in coarse sand or perlite to improve drainage. Aloe vera roots rot quickly in soil that holds too much moisture.
Plant the offset so its base is just below the soil surface. Press the soil gently around it to keep it upright. Do not water immediately.
Step 7: First Watering and Ongoing Care
Wait three to five days after planting before watering for the first time. This allows the roots to adjust and reduces the chance of rot.
Once you begin watering, do so sparingly. Water thoroughly, then allow the soil to dry out completely before watering again. In most climates, this means watering once every one to two weeks.
Place the newly potted pup in bright, indirect sunlight. Avoid direct harsh sun for the first few weeks, as the young plant is still establishing itself.
Method 2: Propagating Aloe Vera from Stem Cuttings
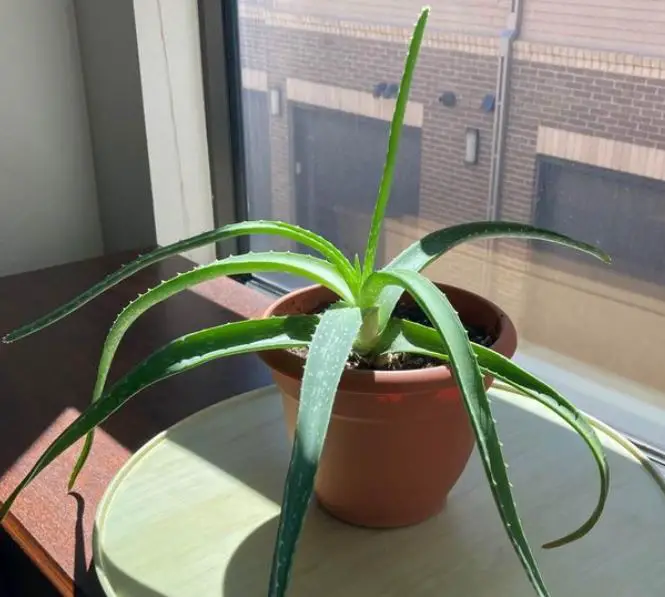
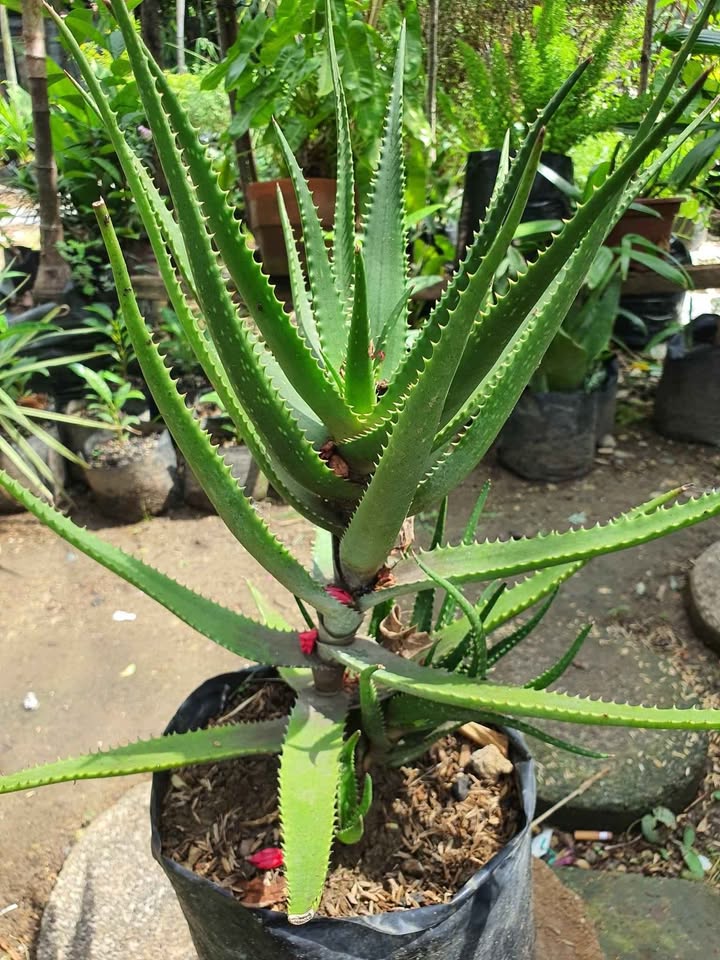
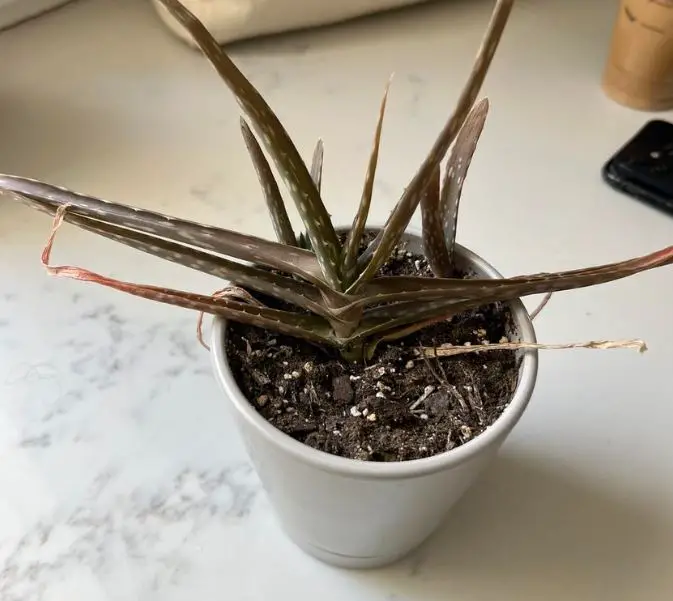
This method is useful when you have an aloe vera plant that has become leggy or has a long, bare stem visible above the soil. It is also helpful if the base of your plant has suffered rot damage but the upper portion remains healthy.
Step 1: Select a Healthy Stem Section
Choose a section of stem that is firm and free of damage. The cutting should ideally be at least ten centimetres (four inches) long and have several healthy leaves attached.
Avoid stems that feel soft, look discoloured, or show any signs of rot or damage at the cut point.
Step 2: Make a Clean Cut
Use your sterilised knife to cut the stem cleanly. A single, smooth cut is better than a sawing motion, which can crush the tissue and introduce more surface area for infection.
Step 3: Allow Callousing
Just as with offsets, let the cut end dry and callous for two to three days before planting. This is essential for stem cuttings too.
Step 4: Apply Rooting Hormone (Optional)
While aloe vera can root without it, dipping the calloused end lightly in rooting hormone powder can speed up the process. Rooting hormone is available at most garden centres and is inexpensive.
Do not apply rooting hormone to fresh cuts — always callous first.
Step 5: Plant and Water Sparingly
Plant the cutting in well-draining soil, burying just enough of the stem to keep it upright. Follow the same watering guidance as for offsets — sparingly and only after a few days.
Stem cuttings can take four to eight weeks to establish a full root system. During this period, do not disturb the plant or check for roots by pulling it up.
Method 3: Propagating Aloe Vera from Leaf Cuttings
I want to be honest here: this method has a low success rate with aloe vera. Unlike many other succulents, aloe leaves do not easily produce roots. More often than not, a detached leaf will simply rot rather than sprout.
However, it can work under the right conditions, and some growers have had success with it. Here is the correct approach if you choose to try it.
Step 1: Select a Healthy, Mature Leaf
Choose a leaf from the outer ring of the plant. It should be plump, firm, and green. Avoid thin, pale, or damaged leaves.
Step 2: Remove the Leaf Cleanly
Cut the leaf as close to the base as possible. A clean cut gives the best chance of success. Twisting or pulling leaves off tends to damage the base and reduces the likelihood of rooting.
Step 3: Callous the Cut End
Allow the cut end to dry for at least three to five days, longer than for other methods. A firm, dry callous is even more important here.
Step 4: Place in Dry Soil
Bury just the bottom two centimetres of the leaf in dry succulent soil. Do not water for the first week. Check periodically for signs of rot. If rot appears, the process has failed and you should discard the leaf.
Some growers report tiny roots appearing after four to six weeks. If small new growth appears at the base, the leaf cutting has succeeded.
Because of its low reliability, this method is best used as an experiment rather than a primary propagation strategy.
Choosing the Right Pot and Soil
The pot and soil you choose have a major impact on propagation success.
For pots, use terracotta or clay containers when possible. These materials allow moisture to evaporate through the walls, which helps prevent root rot. If you use plastic pots, make sure they have multiple drainage holes.
Avoid pots that are too large. A pot that is significantly bigger than the root ball holds excess moisture for too long. Choose a pot that is only slightly larger than the roots you are planting.
For soil, a dedicated succulent or cactus mix is ideal. If you prefer to make your own, combine equal parts regular potting soil, coarse sand, and perlite. This combination drains quickly and does not compact easily over time.
Light, Temperature, and Humidity
Aloe vera thrives in warm, dry conditions. These preferences apply equally to newly propagated plants.
Newly propagated aloe vera does best in bright, indirect light. A windowsill that receives several hours of filtered sunlight each day is ideal during the establishment period. Avoid placing fresh propagations in full direct sunlight immediately, as this can stress the plant before its roots are established.
Once the plant has settled after four to six weeks, it can tolerate more direct sunlight.
The ideal temperature range for aloe vera is between 13°C and 27°C (55°F to 80°F). It does not tolerate frost. In cold climates, ensure propagated plants are kept indoors during winter.
Aloe vera prefers low humidity. Avoid placing it near humidifiers, in bathrooms with poor ventilation, or in rooms that consistently feel damp. High humidity combined with wet soil is a fast path to root rot.
Common Mistakes to Avoid
Even experienced growers make mistakes when propagating aloe vera. Here are the most common ones, along with how to avoid them.
Overwatering is the number one cause of failure. It is tempting to water frequently, especially when you want the new plant to grow quickly. Resist this urge. The soil must dry out fully between waterings.
Skipping the callousing step is another frequent error. Many beginners plant immediately after cutting and then wonder why the plant rots within days. Always allow the wound to dry.
Using the wrong soil also leads to problems. Regular garden soil or potting mix without added drainage material stays too wet for aloe vera roots.
Planting pups that are too small reduces success rates. A pup with fewer than four leaves and no visible roots is not ready for separation. Give it more time on the mother plant.
Finally, exposing fresh propagations to intense direct sunlight too early can cause the leaves to dry out and the plant to go into stress before its roots are strong enough to support it.
Signs Your Propagation Is Succeeding
How do you know if your propagated aloe vera is taking root? Here are the positive signs to look for.
The leaves remain firm and plump. If the leaves are softening or becoming mushy at the base, this indicates rot. But if they stay upright and turgid, the plant is managing well.
New leaves begin to emerge from the centre. This is the most obvious sign that your aloe vera has rooted and is actively growing. New growth typically appears within four to ten weeks, depending on the method used and the conditions provided.
The plant resists a gentle tug. After a few weeks, gently hold the base of the plant and give a very light tug. If it resists, roots have anchored it into the soil.
When to Repot a Successfully Propagated Aloe Vera
Once your propagated aloe vera shows consistent new growth and is clearly established, you may eventually need to repot it.
Repot when roots begin growing out of the drainage holes, or when the plant looks too large for its container and begins to tip.
Choose a new pot that is about two to three centimetres wider in diameter than the current one. Follow the same soil guidelines and give the freshly repotted plant a few days before watering again.
Suggested For You:
Overwatered Aloe Vera Plant: How to Spot It, Save It, and Never Make the Same Mistake Again
Sunburnt Aloe Vera Plant: How to Recognize Sun Damage, Treat and Protect Your Plant Going Forward
25 Types of Aloe Plants: Identification and Growing Guide
Aloe Vera Cultivation: History, Features and Care Details
Final Thoughts
Propagating aloe vera is genuinely one of the most satisfying gardening activities I know. There is something deeply rewarding about watching a small pup, separated carefully from its mother plant, gradually settle into its own pot and begin to grow new leaves.
The key principles are simple: use healthy offsets, let cuts callous, plant in well-draining soil, and resist the urge to overwater. Follow these guidelines, and you will almost certainly succeed.
Whether you are propagating to fill your own home with greenery, to give to friends, or simply to keep your original plant healthy, the process is the same. Take your time, be patient with the early stages, and trust that the plant knows what it is doing.
References
- University of Florida IFAS Extension — Aloe vera: An Ancient Plant for Modern Times https://edis.ifas.ufl.edu/publication/EP472
- Purdue University Center for New Crops & Plant Products — Aloe barbadensis Miller https://www.hort.purdue.edu/newcrop/duke_energy/Aloe_barbadensis.html
- North Carolina State University Extension — Aloe vera Plant Care and Propagation https://plants.ces.ncsu.edu/plants/aloe-vera/
- University of California Agriculture and Natural Resources — Succulents: Planting and Care in the Home Garden https://ucanr.edu/sites/nm_uc_master_gardeners/files/186534.pdf
- Clemson University Cooperative Extension — Aloe vera Indoors https://hgic.clemson.edu/factsheet/aloe-vera/
Tim M Dave is a gardening expert with a passion for houseplants, particularly cacti and succulents. With a degree in plant biology from the University of California, Berkeley, he has vast experience in gardening. Over the years, he has cultivated a vast collection of desert plants and learned a great deal about how to grow and care for these unique companions.