15 Common Orchid Leaf Problems (And How To Fix Each One)
My first orchid came as a gift, already in bloom, and I assumed I’d killed it within a month when the leaves started looking off. Turns out, I’d simply misread what the plant was telling me.
Orchids have an undeserved reputation for being fussy. In truth, moth orchids — the most widely sold variety — are easy to grow and can survive many of the inevitable mistakes, like the occasional overwatering, that would kill less resilient houseplants.
Leaves are where orchid problems show up first, long before roots or flowers reveal any trouble. Learning to read them is really the whole skill of growing orchids well.
Here’s something worth knowing upfront: healthy orchid leaves aren’t supposed to be deep, glossy green. A slightly yellow-green or olive shade is actually the sign of a plant getting the right amount of light, which surprises a lot of new growers.
Part of the confusion comes from just how many orchid species exist in cultivation. Over 100 diseases alone have been documented affecting orchids worldwide, though thankfully only a handful show up regularly in home growing conditions.
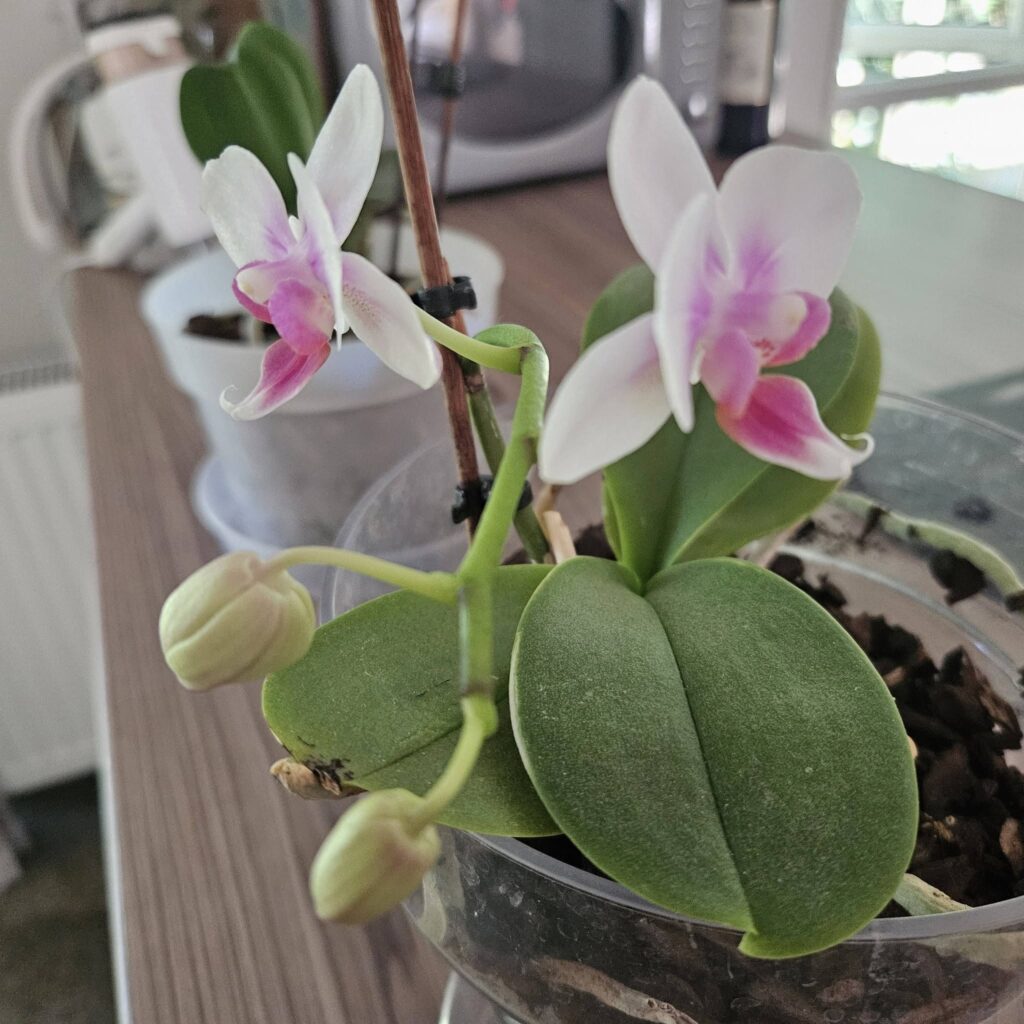
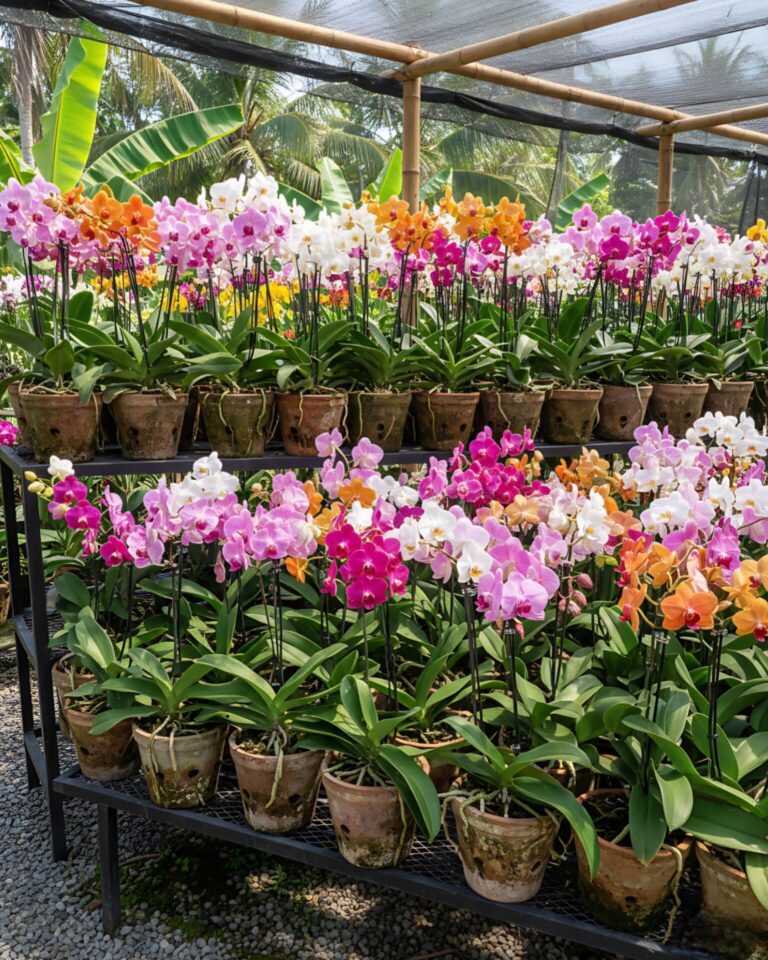
Phalaenopsis, the moth orchid, dominates the houseplant market and is the variety most people picture when they hear the word “orchid.” It’s also one of the more forgiving genera, which makes it a reasonable starting point even for growers with no orchid experience at all.
ALSO READ: 35 Distinctive Types of Orchids (Names With Pictures)
I’ve found that once you stop treating orchid leaves as decoration and start reading them as information, care gets a lot less stressful. Color, texture, and firmness each tell a different part of the story.
This guide walks through the 15 leaf problems gardeners run into most often, with clear, practical fixes. Let’s work through them one at a time.
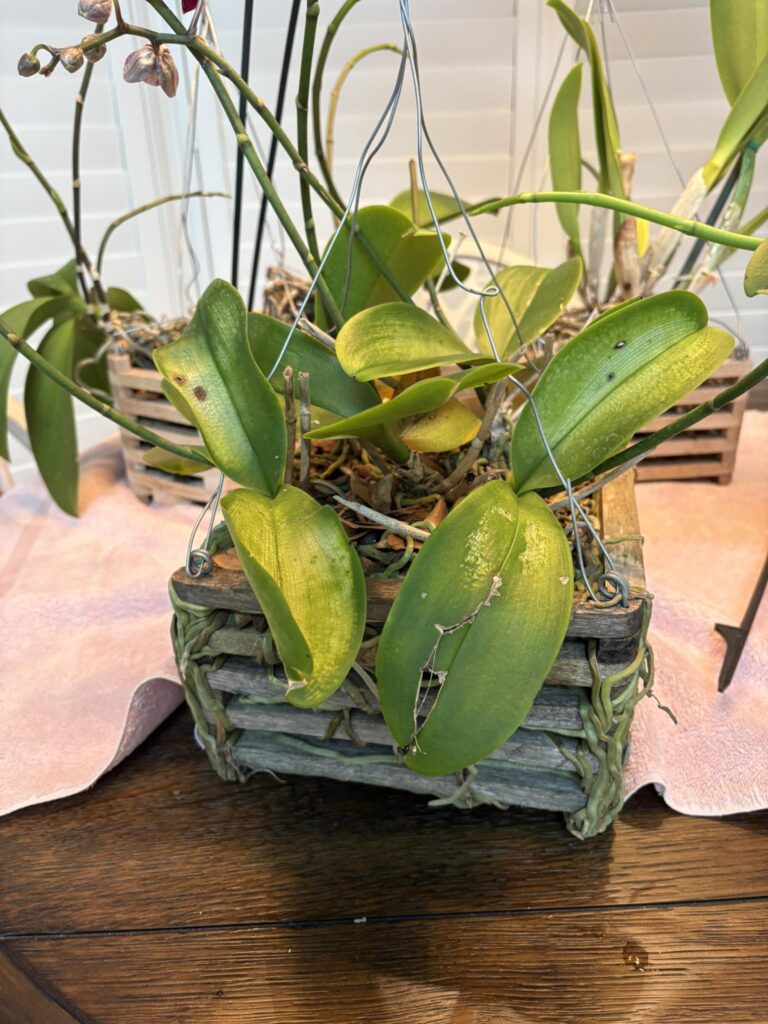
1. Yellowing Lower Leaves (Natural Aging)
This is, by far, the most common source of orchid panic — and often the least serious. A mature orchid naturally sheds a leaf or two per year as part of its normal growth cycle.
How to tell: If it’s just one or two of the oldest, lowest leaves turning yellow while the rest of the plant looks firm and green, this is simply the plant retiring old growth to support new leaves.
The fix: Leave the leaf attached until it turns yellow, weakens, and comes away easily on its own. It’s still supplying nutrients to the plant while it clings on, so resist the urge to pull it prematurely.
2. Yellowing New Or Upper Leaves
Unlike the natural aging pattern above, yellowing that appears on young, upper leaves signals an active problem rather than a normal life cycle event.
Common causes:
- Overwatering and early root rot
- Too much direct light
- Temperature stress, especially cold drafts
The fix: Check the roots first, since root damage is the most frequent underlying cause. Firm, plump roots mean the issue is likely light or temperature related; mushy, discolored roots point to overwatering.
READ MORE ON: 11 Reasons Why Orchid Leaves Turn Yellow ( And Fixes That Work)
3. Root Rot Causing Leaf Collapse
When yellowing spreads across several leaves at once, root rot is often the hidden cause working from below the surface.
Why it happens: Bacterial rot can occur if water is allowed to sit around the center shoot or in the leaf sheaths for a long period, and overwatering more broadly causes roots to rot from lack of oxygen.
The fix: Remove the plant from its pot and trim away any brown or mushy roots with a sterilized blade. Repot into fresh bark mix, and water only in the morning so plants can dry out by nightfall.
Bark potting media naturally breaks down over time, holding more moisture and less air the longer it sits. Replacing the media roughly every two years, even before problems appear, prevents much of this from happening in the first place.
Keep the plant somewhere with good air circulation, indirect light, and a warm daytime temperature above 75°F while it recovers. A small fan running nearby can make a real difference in how quickly the roots and surrounding leaves bounce back.
4. Wrinkled Or Pleated Leaves
Leaves that look wrinkled, ribbed, or slightly deflated rather than smooth and taut are showing a water balance problem, even if the soil looks fine at a glance.
Why it happens: Wrinkling often points to root damage that’s interrupting the plant’s ability to move water and nutrients upward, even when watering technique itself seems reasonable.
The fix: Inspect the root system directly rather than guessing from the leaves alone. Firm white or green roots suggest the issue is elsewhere; soft, hollow, or browned roots need trimming and a switch to fresh potting media.
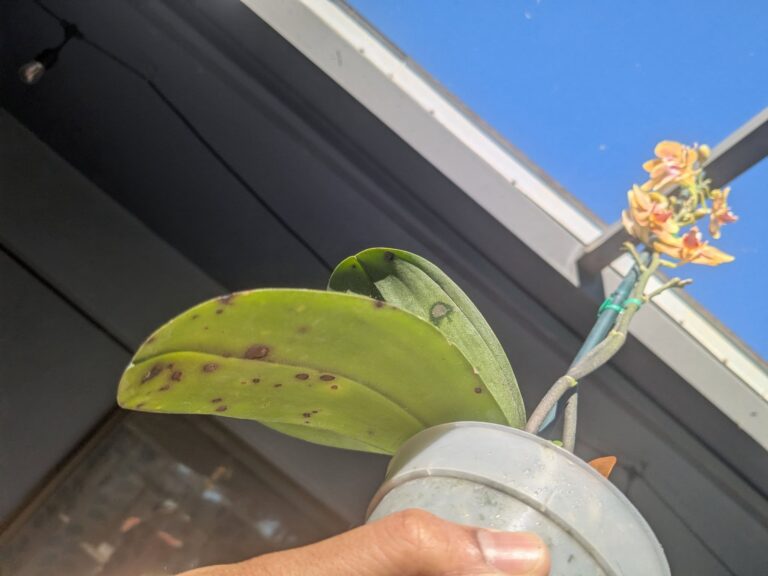
5. Brown, Sunken Spots (Bacterial Brown Spot)
A small, soft, water-soaked blister on a leaf that darkens and enlarges over a day or two is the hallmark of bacterial brown spot, one of the most common and serious phalaenopsis diseases.
Why it’s urgent: In advanced stages, the infected area exudes a foul-smelling dark liquid, and the disease can spread with alarming speed once it reaches the leaf tip.
The fix: Isolate the plant immediately from others. Cut out the infected tissue with a sterilized blade, cutting well into healthy tissue beyond the visible spot. Apply a bactericide formulated for orchids and improve air circulation around the plant going forward.
6. Sudden Soft, Mushy Leaf (Bacterial Soft Rot)
If an entire leaf turns slimy and collapses within a day or two, accompanied by an unpleasant smell, this is bacterial soft rot rather than a slower-developing disease.
Why it happens: This type of rot typically enters through wounds and spreads so rapidly that plants can be completely rotted within two to three days if left untreated.
The fix: Act immediately. Remove the entire affected leaf, cutting back into clean tissue with a sterile blade. Treat the cut surface with a cinnamon paste or fungicide-bactericide combination, and reduce humidity around the plant while it recovers.
7. Small Round Spots With Yellow Halos (Fungal Leaf Spot)
Circular spots that start yellow and slowly turn brown, typically appearing on the undersides of leaves first, point toward a fungal leaf spot infection rather than a bacterial one.
How to tell it apart from bacteria: Fungal spots progress more slowly and lack the foul odor associated with bacterial infections, making smell one of the easiest ways to distinguish between the two.
The fix: Remove severely affected leaves and treat the plant with a sulfur-based or copper-based fungicide. Improve airflow and avoid getting water on the foliage during future waterings.
8. Sunburned Or Bleached Patches
Pale yellow, white, or bleached patches, often with a slightly scorched texture, indicate the leaf has taken in more direct sun than it can handle.
Why it happens: Under very high light, orchid leaves can develop a pink or reddish tint along the margins before turning yellow-green or nearly yellow overall — a clear signal that light levels need adjusting.
The fix: Move the plant out of direct sun and into bright, indirect light, such as an east-facing window. Unfortunately, sunburned tissue itself cannot be reversed, so future prevention matters more than treating existing damage.
9. Dark Green, Overly Soft Leaves
Leaves that look unusually dark, glossy, and floppy rather than firm are signaling the opposite problem from sunburn: not enough light.
Why it happens: Low light conditions produce leaves that are dark green and feel stiff or limp, since the plant isn’t generating enough energy to support firm, healthy growth.
The fix: Gradually increase light exposure over one to two weeks to avoid shocking the plant. The goal is a leaf that reads as light, olive green — a strong indicator that light levels are properly balanced.
10. Curling Leaves
Leaves that curl inward or cup slightly are typically defending themselves against a stressor, most often light or temperature related, rather than showing signs of disease.
Common triggers:
- Excess light causing leaf-scorch defense curling
- Temperatures that are too high or too low
- Underwatering combined with root stress
The fix: Assess light and temperature first, since these are the most frequent causes. Move the plant away from heating vents, cold windows, or intense afternoon sun, and monitor for improvement over the following weeks.
11. Sticky Residue On Leaves
A few sticky droplets in predictable spots on a leaf are often just natural exudate and nothing to worry about. But widespread stickiness across the whole leaf, especially paired with other blemishes, usually signals pests.
The fix: Wipe the leaf clean with a damp cloth and inspect closely for mealybugs, scale, or aphids hiding in leaf joints. If a black, sooty coating accompanies the stickiness, it typically means the issue has been present for some time and needs prompt pest treatment.
12. Mealybugs On Leaves
Small, white, fluffy insects clustered in the tight spaces where leaves meet the stem are the clearest sign of a mealybug infestation on orchids.
The fix: If caught early, mealybugs can be removed with isopropyl alcohol on a cotton swab. For larger infestations, follow up with a diluted insecticidal soap spray, repeating weekly until no new insects appear.
13. Scale Insects On Leaves
Small, hard, dome-shaped bumps along the leaf surface or stem, often resistant to being wiped away easily, point to scale rather than mealybugs.
The fix: Scrape visible scale off gently with a fingernail or soft brush, then wipe the area with rubbing alcohol. Horticultural oil applied afterward helps smother any remaining eggs or juveniles that escaped the first treatment.
14. Black Spots From Water Buildup
Small black dots appearing where water has pooled and dried on the leaf surface are a distinct, cosmetic-but-preventable issue rather than a disease.
Why it happens: When water sits on the leaf surface, particularly after misting or fertilizing, it can block the leaf’s pores and prevent proper gas exchange, leaving behind small dark marks.
The fix: After watering or misting, gently blot any standing water from the crown and leaf surfaces with a soft cloth. Water in the morning so plants have time to dry fully before evening.
READ MORE: Black Spots on Orchid Leaves Are a Warning Sign — Here Is What Your Plant Is Trying to Tell You
15. Twisted Or Distorted New Growth
New leaves that emerge visibly twisted, thin, or oddly shaped, rather than the plant’s normal leaf form, point to a more serious underlying issue than routine environmental stress.
Why it happens: This pattern often accompanies advancing root rot, where damaged roots can no longer properly nourish the developing leaf, or in some cases signals a viral infection that alters new growth permanently.
The fix: Inspect the roots thoroughly and address any rot found there first. If new growth remains distorted despite healthy roots and consistent care, consider having the plant tested for viral infection, since viral orchids should be isolated from healthy collections.
A Quick Word On Prevention
Most orchid leaf problems trace back to the same handful of habits: watering technique, light exposure, and airflow. Incorrect watering is widely considered the single most common cause of orchid decline, yet it’s also the easiest habit to correct once you know what to look for.
A simple routine helps more than any single product or fertilizer. Water thoroughly, let the medium approach dryness before watering again, keep the crown and leaf joints free of standing moisture, and place the plant somewhere with steady air movement. These four habits alone prevent the majority of the problems covered in this guide.
It’s also worth remembering that roots and leaves are deeply connected, even though they can look completely unrelated at first glance. When leaves start behaving strangely and the cause isn’t obvious, checking the roots first will usually explain what’s really going on.
ALSO READ: Are Orchids Toxic to Cats? What Every Pet Owner Needs to Read
Quick Symptom-To-Solution Chart
| Symptom | Likely Cause | Quick Fix |
| Yellow lower leaf only | Natural aging | Leave attached until it falls |
| Yellow new/upper leaves | Overwatering or light stress | Check roots, adjust care |
| Wrinkled, pleated leaves | Root damage | Inspect and trim roots |
| Soft, foul-smelling spot | Bacterial brown spot/rot | Isolate, cut out, treat |
| Small spots, yellow halo | Fungal leaf spot | Fungicide, improve airflow |
| Bleached or scorched patches | Sunburn | Move to indirect light |
| Dark, floppy leaves | Too little light | Increase light gradually |
| Sticky residue | Pest activity | Clean, inspect for pests |
| Cottony white clusters | Mealybugs | Alcohol swab + soap spray |
| Twisted new growth | Root rot or virus | Check roots, consider testing |
Frequently Asked Questions
Should I cut off yellow orchid leaves?
Not immediately. A leaf that’s still partially green is still supplying nutrients to the plant, so it’s worth waiting until it turns fully yellow, weak, and easy to detach. Brown, rotting, or diseased leaves should be removed promptly, though, to protect the rest of the plant.
How often should I water my orchid?
There’s no universal schedule, since potting medium, pot size, and season all affect how quickly it dries. Bark mix generally needs watering about once a week, while moss retains moisture longer and needs less frequent watering. Always check the medium directly rather than following a fixed calendar.
Why does my orchid have healthy roots but still show yellow leaves?
Not every yellowing issue traces back to roots. Light exposure, temperature swings, and natural leaf aging can all cause yellowing even when the root system looks completely healthy. Consider the plant’s location and recent environmental changes if roots check out fine.
Is it normal for orchid leaves to feel slightly rubbery?
Yes, most healthy phalaenopsis leaves have a somewhat thick, leathery texture rather than being thin and delicate. A leaf that’s gone truly limp or paper-thin, though, usually signals dehydration or root damage worth investigating.
Can I save an orchid with severely spotted leaves?
Often, yes. Removing affected leaves, correcting the underlying watering or airflow issue, and treating with an appropriate fungicide or bactericide gives most orchids a real chance at recovery, provided the roots and crown remain healthy.
Final Thoughts
Almost every orchid leaf problem traces back to one of three things: watering habits, light levels, or airflow around the plant. Once you identify which one is off, most fixes are quick and the plant recovers well.
Watch the leaf color as your guide — a light olive green means you’re getting light right — check roots before panicking about leaves, and let old yellow leaves fall on their own schedule. Do that consistently, and your orchid should reward you with healthy foliage and reliable blooms for years to come.
References
- Clemson Cooperative Extension, Home & Garden Information Center — General Care for Phalaenopsis Orchids
- Clemson Cooperative Extension, Home & Garden Information Center — Orchids
- University of Maryland Extension — Care of Phalaenopsis Orchids (Moth Orchids)
- University of Maryland Extension, Maryland Grows Blog — Q&A: What Causes Orchid Leaves To Turn Yellow And Shrivel?
- University of Florida, IFAS Gardening Solutions — Orchids
- University of Connecticut, Home Garden Education Center — Orchid Care and Repotting
- University of Hawaii, Extension Entomology & Plant Pathology — Phyllosticta capitalensis (Orchid Leaf Spot)

Tim M Dave is a gardening expert with a passion for houseplants, particularly cacti and succulents. With a degree in plant biology from the University of California, Berkeley, he has vast experience in gardening. Over the years, he has cultivated a vast collection of desert plants and learned a great deal about how to grow and care for these unique companions.