Dividing Hostas: When and How to Split Your Plantain lilies
If there is one plant that genuinely rewards the gardener who pays attention, it is the hosta. Year after year, these hardy, shade-loving perennials return with broader clumps, lusher foliage, and a quiet dependability that few other plants can match.
But here is something many gardeners discover only by accident: splitting hostas does not harm them. It actually makes them better.
Dividing a hosta — separating one large clump into several smaller plants — is one of the most practical and satisfying tasks in the garden calendar. It refreshes ageing clumps, controls size, multiplies your planting stock for free, and, if done correctly, invigorates growth for the seasons ahead.
This guide walks you through every aspect of the process: when to split, why it matters, the tools you need, the step-by-step method, and how to care for your divisions afterwards.
What Happens When Hostas Are Left Unsplit
Hostas are not delicate plants. Left entirely to their own devices, most varieties will continue to grow for many years without any intervention. But there is a cost to neglect.
Over time, large hosta clumps can become congested at the centre. The oldest sections of the crown — the central core — gradually become woody, unproductive, and less able to absorb water and nutrients effectively. You may notice the centre of a mature clump starting to die back, producing fewer or smaller leaves while the outer edges continue to grow vigorously.
This is called clump decline, and it is a natural part of a hosta’s growth cycle. Splitting reverses it.
Beyond aesthetics and plant health, there is also the simple matter of space. Some hosta varieties, particularly large cultivars like ‘Sum and Substance’ or ‘Empress Wu’, can reach 90–120 cm in spread after several years.
In a mixed border, this can crowd out neighbouring plants and upset the balance of the planting scheme.
Dividing regularly — typically every three to five years — keeps clumps productive, proportionate, and visually appealing.
Why Split Hostas at All? The Key Benefits
There are several compelling reasons to divide hostas, beyond simply managing their size.
1. Rejuvenated growth. Splitting stimulates the plant. Fresh divisions, placed in well-prepared soil, push out new roots and foliage with renewed vigour. In many cases, a divided hosta looks better in its second season than the undivided original did in its fifth.
2. Free plants. One mature hosta clump can typically yield four to ten or more divisions, depending on size. These can fill gaps in your own garden or be passed on to friends, neighbours, or plant swaps — at zero cost.
3. Better plant health. Dividing reduces competition for water, nutrients, and root space within the clump. It also improves air circulation, which can reduce the risk of fungal problems in dense, humid growing conditions.
4. Design flexibility. Gardens evolve. Splitting allows you to redistribute hostas around the garden, use them as ground cover beneath trees, or create new shaded borders with plants you already own.
5. Control over size. If a particular hosta has outgrown its allotted space, division is the most direct and natural solution — far preferable to digging the entire plant out and discarding it.
When Is the Best Time to Split Hostas?
Timing is the single most important factor in a successful division. Get it right, and the divisions establish quickly and with minimal stress. Get it wrong, and recovery can be slow — or worse, the divisions may fail entirely.
Early Spring: The Preferred Window
The best time to split hostas is in early spring, just as the new shoots emerge from the ground. At this stage, the characteristic rolled or pointed “pips” — the emerging growth tips — are clearly visible, but the leaves have not yet unfurled. This makes the crown structure easy to see and assess, and the plant has a full growing season ahead of it to recover and establish.
In most temperate climates, this window falls between mid-March and mid-April, depending on local conditions and the specific hosta variety.
Splitting at this stage has several advantages. The foliage is not yet developed, so there is no wilting or scorching of leaves during transplanting. The soil is typically moist from winter rainfall. And the cool temperatures reduce transplant stress on the root system.
Autumn: A Viable but Secondary Option
Early autumn — specifically September and October in most regions — is the second-best time for division. The summer heat has passed, the soil is still warm enough to encourage new root growth before winter, and the plant is beginning to wind down its above-ground activity.
Autumn division works well in areas with mild winters and reliable autumn rainfall. In colder climates with hard, early winters, spring is strongly preferable, as autumn divisions may not establish sufficient root mass before the ground freezes.
What to Avoid
Avoid splitting hostas in midsummer. At this point, the plant is in full leaf and actively growing. Dividing during hot, dry summer conditions places significant stress on both the roots and the foliage. Even with careful watering, divisions made in July or August are far more vulnerable to wilting, sun scorch, and failure.
Similarly, avoid dividing during or immediately after a prolonged drought, or when the ground is frozen or waterlogged.
Tools You Will Need
Having the right equipment makes the job cleaner, faster, and less damaging to the plant. You do not need specialist tools, but quality matters.
- A sharp spade — for lifting the clump cleanly from the ground
- A garden fork — for loosening the clump before lifting and for separating fibrous root masses
- A sharp knife or pruning saw — for cutting through dense, woody crowns; a long-bladed bread knife works surprisingly well for this purpose
- Secateurs — for trimming damaged roots or cutting back foliage on autumn divisions
- A bucket of water — to keep division roots moist while you work
- Gloves — hosta sap can irritate sensitive skin
- Horticultural grit or perlite — to improve drainage in the planting holes if working in heavy clay soil
- Well-rotted compost or leaf mould — to enrich the replanting area
Sterilise your cutting tools before and after use with a dilute bleach solution or rubbing alcohol. This reduces the risk of transmitting fungal or bacterial pathogens between plants.
How to Split Hostas: Step-by-Step
Step 1: Prepare the New Planting Sites
Before you lift the existing clump, prepare the areas where your divisions will go. This is a detail many gardeners overlook, and it matters.
Dig over the new planting areas thoroughly. Remove weeds and break up compacted soil. Incorporate a generous amount of well-rotted compost or leaf mould — hostas thrive in moisture-retentive, humus-rich soil. If your soil drains poorly, add a small amount of horticultural grit to improve drainage without sacrificing moisture retention.
Having the new sites ready means divisions spend as little time out of the ground as possible. This alone significantly improves success rates.
Step 2: Water the Parent Clump the Day Before
The day before you plan to divide, water the hosta clump thoroughly. Moist roots are more resilient and easier to handle than dry, brittle ones. Well-hydrated tissue is also less susceptible to stress during the division process.
Step 3: Lift the Entire Clump
Using a sharp spade, cut straight down into the soil in a circle around the clump, about 20–30 cm outside the outermost foliage. This creates a clean cut through the outer roots and defines the root ball you are about to lift.
Work the spade under the clump from multiple angles, progressively loosening it. Then use a garden fork to lever the entire root ball free from the ground.
Lift the whole clump onto a flat surface — a tarpaulin, a large board, or simply a clear area of lawn. This gives you room to work and allows you to see the full crown structure clearly.
Step 4: Assess the Crown
Before you make any cuts, take a moment to look at the clump carefully.
You will see a mass of fleshy, overlapping crown sections — each with its own cluster of growth buds (pips) at the top and roots below. These are your divisions-in-waiting. Each division needs at least one pip and a reasonable portion of healthy roots to survive.
If the centre of the clump is hollow, woody, or dead, discard that section. The outer portions, which are actively growing, are what you want.
Step 5: Divide the Clump
There are three approaches, depending on the size and density of the clump.
For small to medium clumps: Simply pull the crown apart by hand. Hostas with relatively loose root masses can often be separated this way with minimal tool use. Ease sections apart gently, following the natural lines of separation between crowns.
For larger or denser clumps: Push two garden forks back-to-back into the centre of the clump and lever them apart. This “back-to-back fork” method tears through the root mass with less damage than cutting and is effective for large, fibrous clumps.
For very dense, mature clumps: Use a sharp knife or pruning saw to cut directly through the crown. Cut with confidence — hesitant, sawing cuts cause more damage than a single, decisive slice. Each cut should pass through cleanly.
Aim for divisions of a reasonable size — roughly the size of a dinner plate or larger. Very small divisions (single-pip divisions) will survive but take much longer to produce a display-worthy plant. Larger divisions establish faster and look better sooner.
Step 6: Trim and Tidy Each Division
Once separated, inspect each division. Trim away any damaged, rotting, or excessively long roots with clean secateurs. If dividing in autumn, you may also want to trim the foliage back by half — this reduces water loss through the leaves while the roots re-establish.
If dividing in spring, the foliage pips will still be tightly rolled or just emerging and need no trimming.
Step 7: Replant Promptly
Plant each division into its prepared site without delay. The planting depth is important: the crown should sit at roughly the same depth it was growing before, with the growth buds just at or slightly below soil level.
If the buds are planted too deep, the emerging shoots will be slow and weak. Too shallow, and the crown is exposed to frost and drying.
Firm the soil gently around the roots to eliminate air pockets. Water each division generously — at least 5–10 litres per plant — to settle the soil and initiate root-to-soil contact.
Step 8: Mulch and Label
Apply a 5–7 cm layer of organic mulch — composted bark, leaf mould, or well-rotted compost — around each division. Keep mulch away from direct contact with the crown to prevent rot.
If you have divided multiple varieties, label each plant clearly. Hosta leaves look remarkably similar in their early stages, and it is surprisingly easy to lose track of which variety is which before the foliage fully unfurls.
Aftercare: The Critical First Season
The weeks following division are the most important in the plant’s short-term future. Focus on three things: water, shade, and patience.
Watering
Newly divided hostas need consistent moisture to re-establish. In the first four to six weeks after planting, check soil moisture regularly and water deeply whenever the top 5 cm of soil feels dry. Do not allow the divisions to dry out completely during this period.
Once established — typically after six to eight weeks — hostas become considerably more self-sufficient, particularly in shaded positions.
Shade and Shelter
Most hostas prefer partial to full shade, and this preference becomes even more important immediately after division. Protect new divisions from direct afternoon sun, which can scorch the emerging leaves before the root system is fully functional.
If you have planted divisions in a sunnier position than ideal, consider temporary shading with horticultural fleece or a purpose-made shade cloth for the first few weeks.
Feeding
Hold back on heavy fertilising in the first few weeks. A light application of a balanced, slow-release granular fertiliser at planting time is sufficient. Over-feeding young divisions can damage delicate new roots and force leafy growth before the root system is ready to support it.
From the second season onwards, a spring application of a balanced fertiliser or a top dressing of compost will encourage strong, healthy growth.
What to Expect in Year One
Be honest with yourself about expectations. Freshly divided hostas will not look spectacular in their first season. The plant’s energy in year one is devoted largely to root establishment rather than leaf production. Many divisions will produce a smaller, somewhat less impressive display than the original clump.
This is completely normal and temporary. By year two, divisions typically look excellent. By year three, they are often indistinguishable from — or better than — the undivided original.
Troubleshooting Common Problems
Wilting After Division
Some wilting is normal in the days immediately following division, especially if the weather is warm or the divisions were large. Water thoroughly, provide temporary shade if possible, and give the plant time. In most cases, wilting resolves within a week as the roots begin reconnecting with the soil.
If wilting persists beyond two weeks, check whether the crown has been planted too deep, or whether the soil is waterlogged.
Slugs and Snails
Hostas have an unfortunate reputation as a favourite target for slugs and snails. Freshly divided plants — with young, soft emerging foliage — are particularly vulnerable. Use slug control measures proactively around new divisions, whether that is wildlife-friendly iron phosphate pellets, copper tape around containers, or regular hand-picking in the evenings.
Crown Rot
Crown rot, caused by fungal pathogens, can affect divisions planted in heavy, poorly drained soil. Symptoms include soft, discoloured tissue at the base of the crown and a foul smell.
Prevention is far more effective than treatment. Ensure good drainage at the planting site, avoid overwatering, and keep mulch away from the crown. If rot is detected, remove affected tissue with a clean knife, dust the cut surfaces with sulphur powder, and replant in a better-drained location.
Failure to Establish
Occasionally, a division simply fails — producing no new growth after several weeks. This usually reflects a division that was too small, had insufficient root tissue, or was exposed to extreme conditions after planting.
Do not give up immediately. Leave the plant in place for a full growing season before concluding it has failed. Some slow-starting divisions surprise gardeners with late-season growth.
Splitting Hostas in Containers
Hostas are excellent container plants, but pot-grown specimens often need dividing more frequently than their in-ground counterparts — typically every two to three years — because their root systems become restricted more quickly.
The method is the same: tip the entire root ball out of the container, separate the crown into sections, and replant into fresh compost. Use a moisture-retentive, peat-free potting compost mixed with a small amount of horticultural grit to provide good drainage with adequate moisture retention.
Water container divisions more frequently than in-ground plants, as pots dry out much faster.
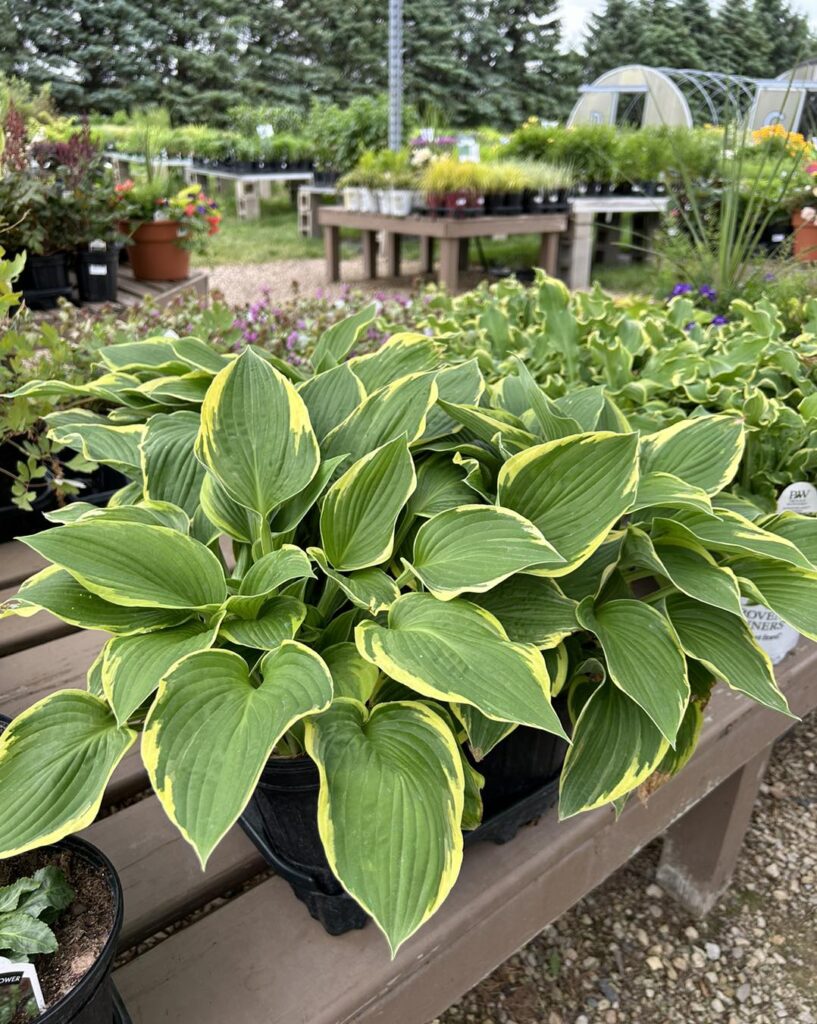
Which Hosta Varieties Divide Best?
All hosta varieties can be divided, but some are more accommodating than others.
Fast-growing, large-leaved varieties — such as ‘Halcyon’, ‘Frances Williams’, and ‘Gold Standard’ — produce substantial clumps quickly and divide easily, often yielding many sections in a single division session.
Miniature and small varieties — such as ‘Pandora’s Box’ or ‘Blue Mouse Ears’ — grow more slowly and produce smaller clumps. These can still be divided, but require more patience and care to produce divisions of sufficient size.
Slug-resistant varieties with thicker, more corrugated leaves — such as ‘Elegans’ or ‘Halcyon’ — are often the most rewarding choices for gardeners in high-slug environments, as they are better able to recover from pest damage after division.
The Broader Value of Hostas in the Garden
It is worth stepping back for a moment and appreciating what hostas bring to a garden beyond their practical divisibility.
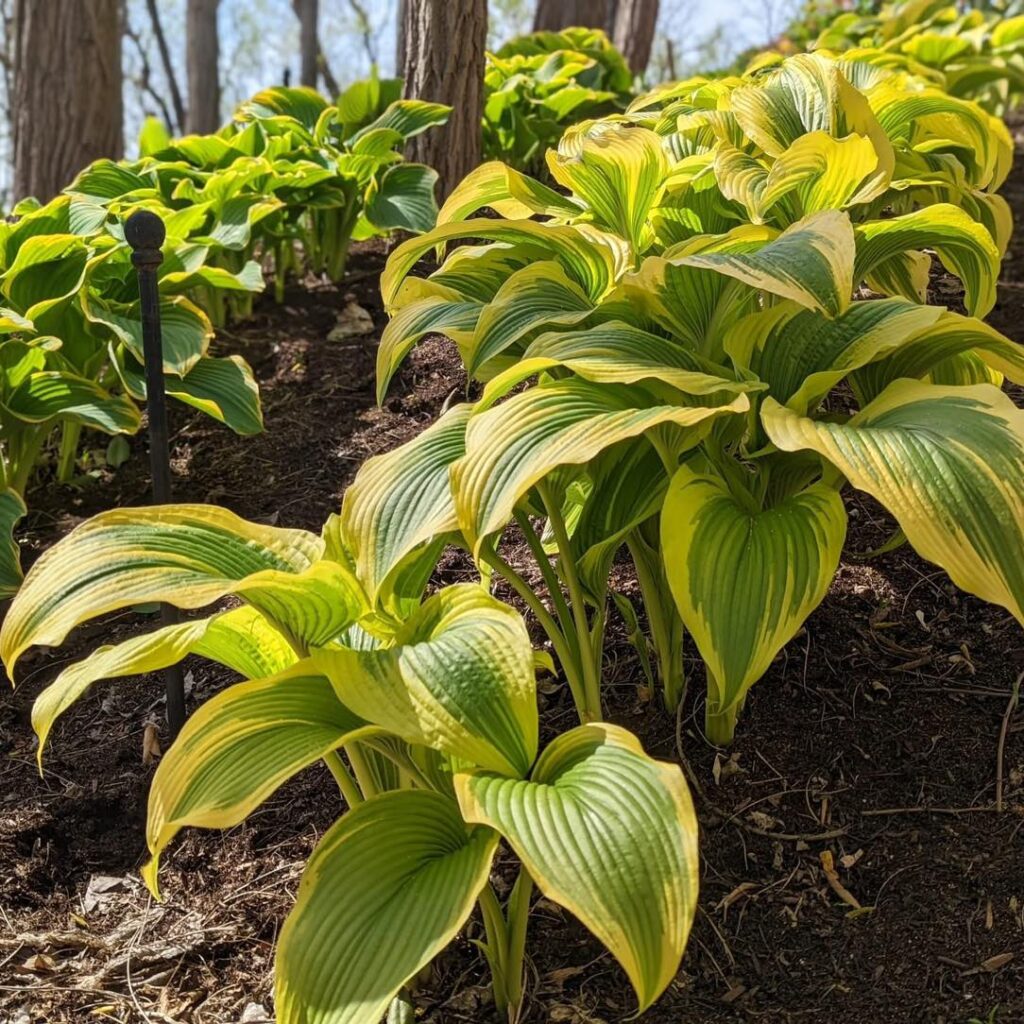
They are, quite simply, some of the most versatile and reliably beautiful foliage plants available to temperate gardeners. Their range of leaf colour — from deep blue-green to golden yellow, cream-variegated to almost white — is extraordinary. Their texture, from smooth and glossy to deeply puckered and corrugated, adds tactile interest to shaded areas that few flowering plants can match.
They thrive where many other plants refuse to grow: under established trees, on north-facing slopes, in the deep shade of walls and fences. They suppress weeds effectively once established. They are generally long-lived, low-maintenance, and tolerant of a wide range of soil conditions.
And when you divide them — giving freely of what has grown so generously — you extend that value outward, filling more of the garden with beauty that cost you nothing but time and attention.
Suggested For You:
Not a Lily? Think Again — 15 Stunning Flowers That Look Just Like Lilies
15 Stunning Purple Flowers That Look Like Bells — Vibrant Choices for Your Garden
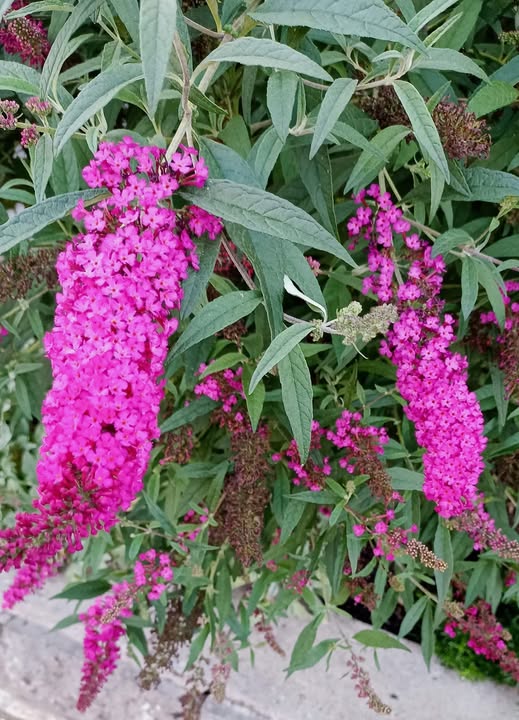
Butterfly Bush (Buddleja davidii): History, Cultivation and Problems
8 Reasons Your Peace Lily Flowers are Turning Black (And What to Do)
The Poinsettia Plant: History and Care Details of This Vibrant Christmas Flower
Summary: Key Points to Remember
- Split in early spring when growth tips are just emerging — this is the best time by far
- Autumn is acceptable in mild climates; avoid midsummer division entirely
- Prepare new planting sites first so divisions are out of the ground for the shortest possible time
- Each division needs at least one pip and healthy roots to establish successfully
- Plant at the correct depth — crown buds at or just below soil level
- Water generously after planting and consistently for the first six to eight weeks
- Expect modest growth in year one — year two and beyond is where the reward lies
- Mulch well to retain moisture and suppress weeds, but keep mulch off the crown
- Label varieties after dividing, before the leaves open and identification becomes harder
Splitting hostas is one of gardening’s more generous acts. You take one plant, give it a little care and attention, and return to the garden with many. That is a transaction worth making every few years.
References
- University of Minnesota Extension — Hostas for Minnesota Gardens https://extension.umn.edu/flowers/hostas
- Penn State Extension — Hosta: A Perennial for the Shade Garden https://extension.psu.edu/hosta-a-perennial-for-the-shade-garden
- University of Illinois Extension — Hostas in the Landscape https://extension.illinois.edu/blogs/good-growing/2021-04-01-hostas-landscape
- Cornell University Cooperative Extension — Perennial Plant Division and Propagation https://gardening.cals.cornell.edu/lessons/techniques/dividing-perennials/
- North Carolina State University Extension — Hosta (Hosta spp.) Plant Profile and Care Guide https://plants.ces.ncsu.edu/plants/hosta/
Tim M Dave is a gardening expert with a passion for houseplants, particularly cacti and succulents. With a degree in plant biology from the University of California, Berkeley, he has vast experience in gardening. Over the years, he has cultivated a vast collection of desert plants and learned a great deal about how to grow and care for these unique companions.