You Can Grow Strawberries from a Strawberry — Here Is Exactly How to Do It
Most people buy strawberry plants from a nursery. That is the straightforward route. But there is a more fascinating option — one that costs almost nothing and teaches you something genuinely useful about how plants work.
You can grow new strawberry plants directly from the fruit itself, using the seeds embedded in that familiar red surface.
It requires patience. It requires a few simple steps done correctly. And it rewards you with plants that are entirely your own — grown from seed, from scratch, from a single fruit sitting on your kitchen counter.
This guide walks you through the complete process: how to extract seeds from a strawberry, how to germinate them successfully, how to raise seedlings into healthy transplants, and how to get your first harvest.
It also covers the faster method — propagating from runners — so you have both options clearly explained.
Method One: Growing Strawberries from Seed
Step 1 — Choose Your Strawberry
The source of your seeds matters. Here are your main options:
Store-bought strawberries are typically hybrid varieties (such as Camarosa or Chandler). Seeds from these will germinate, but the offspring will be genetically variable. Results are unpredictable. Still, many home gardeners have grown productive plants this way.
Heirloom or open-pollinated varieties produce seeds that grow true to the parent plant. Alpine strawberries (Fragaria vesca) are the gold standard for seed-grown strawberries. They are compact, runnerless, prolific, and their seeds germinate more reliably than commercial hybrid varieties.
Purchasing seed packets from a reputable supplier is the most reliable starting point. Packets from university extension-recommended suppliers or established seed companies give you known variety, germination rate data, and growing notes.
If you are using a fresh strawberry from your kitchen, choose one that is fully ripe — deep red all the way through, soft, and sweet-smelling. Underripe fruit contains immature seeds that germinate poorly.
Step 2 — Extract the Seeds
This step is simple but requires a bit of care.
Method A: The scraping method Using a toothpick, butter knife, or your fingernail, gently scrape the seeds off the surface of the strawberry. Work over a piece of white paper or a small plate so you can see what you are collecting. The seeds are tiny — about the size of a grain of sand — so work slowly.
Method B: The blender method (for large quantities) Place the strawberry in a blender with a small amount of water. Pulse briefly — just two or three short bursts. The viable seeds will sink to the bottom; the pulp will float. Pour off the pulp and water carefully, then collect the seeds from the bottom. Rinse gently through a fine mesh strainer and spread on a paper towel to dry.
Method C: Drying the whole fruit For a slower but very low-effort approach, allow a ripe strawberry to dry out completely in a warm, well-ventilated spot. Once fully dried — which takes one to two weeks — the seeds are easily scraped from the shriveled surface. This method works well with alpine strawberries.
Once extracted, allow seeds to dry on a paper towel for 24 to 48 hours before planting or storing. Wet seeds planted immediately are prone to mold.
Step 3 — Cold Stratification (Do Not Skip This)
This is the step most beginners overlook, and it is the most common reason home-grown strawberry seeds fail to germinate.
Strawberry seeds require a period of cold, moist conditions before they will germinate. In nature, this happens when seeds overwinter in the soil. At home, you replicate it through a process called cold stratification.
Here is how:
- Place your dried seeds on a damp paper towel — not dripping wet, just evenly moist.
- Fold the paper towel over the seeds to enclose them.
- Place the folded towel in a small zip-lock bag or sealed container.
- Label it with the date and variety.
- Place it in the refrigerator for 3 to 4 weeks.
The temperature in a standard home refrigerator (35 to 40°F / 2 to 4°C) is ideal. During this time, the seeds undergo internal changes that prepare them for germination. After stratification, they germinate far more quickly and evenly than unstratified seeds.
Some alpine strawberry varieties germinate without stratification, but even they benefit from it. When in doubt, stratify.
Step 4 — Prepare Your Germination Setup
While your seeds are in the refrigerator, prepare your germination containers and growing medium.
Use a seed-starting mix, not regular potting soil. Seed-starting mix is finely textured, low in nutrients, and designed for germination. Regular potting mix is too coarse and often too rich for delicate seeds. You can find seed-starting mix at any garden center, or make your own by combining equal parts peat moss (or coco coir), perlite, and vermiculite.
Container options include:
- Seed trays with individual cells (72-cell trays are ideal)
- Small biodegradable peat pots
- Recycled yogurt cups or egg cartons (with drainage holes punched in the bottom)
- A shallow tray for broadcast sowing, thinned later
Fill your containers with moistened seed-starting mix. The mix should feel like a wrung-out sponge — evenly damp but not dripping. Press it gently to eliminate large air pockets.
Step 5 — Sow the Seeds
Remove your seeds from the refrigerator. Take them out of the bag and allow them to come to room temperature for 30 to 60 minutes before sowing.
Strawberry seeds are surface-sown. This means you do not bury them. Simply place the seeds on top of the moist growing medium — one to two seeds per cell if using a tray, or scattered thinly across the surface if using a flat tray. Press them gently onto the surface with your fingertip to ensure good contact with the medium.
Do not cover with soil. Strawberry seeds need light to germinate. A very thin dusting of vermiculite (just enough to barely cover) is acceptable and helps retain surface moisture without blocking light.
Cover the tray or container with a clear plastic dome or stretch wrap to maintain humidity. Place in a warm location — 65 to 75°F (18 to 24°C) is ideal. A heat mat set to 70°F speeds germination noticeably.
Place the setup under grow lights or in a bright window. Strawberry seeds need light during germination — a south-facing window or a standard LED grow light on a 14-hour cycle works well.
Step 6 — Germination and Early Seedling Care
With cold stratification, most strawberry seeds germinate within 1 to 3 weeks at room temperature. Without stratification, germination can take 3 to 6 weeks or more — and rates are often disappointing.
Once you see the first tiny seedlings emerging, remove the plastic cover to allow air circulation. This is critical — seedlings left under a dome too long develop damping off, a fungal condition that collapses the stem at soil level and kills seedlings quickly.
At this stage:
- Keep the growing medium consistently moist but never waterlogged
- Water from below when possible — set the tray in a shallow dish of water and allow it to absorb upward, then remove after 20 minutes. This avoids wetting the delicate foliage.
- Maintain temperatures between 60 and 70°F (16 to 21°C)
- Provide at least 12 to 14 hours of light daily
Begin feeding with a very diluted liquid fertilizer (quarter-strength balanced fertilizer) once seedlings have developed their first true leaves — the second pair of leaves that appears after the initial seed leaves.
Step 7 — Thinning and Transplanting Seedlings
When seedlings reach about 2 to 3 inches tall and have developed two to three true leaves, they are ready for thinning or transplanting.
If you broadcast-sowed into a flat tray, thin to the strongest seedlings spaced at least 2 inches apart. Use scissors to snip the weakest ones at soil level rather than pulling them, which disturbs roots of neighboring seedlings.
When seedlings are 3 to 4 inches tall and well-rooted, transplant into individual 3- to 4-inch pots filled with standard potting mix. Handle them by the leaves, not the stems — strawberry seedling stems are fragile, and crushing the stem even slightly can introduce disease.
Step 8 — Hardening Off
Before moving seedlings outdoors permanently, harden them off over 7 to 10 days. This gradual acclimatization prevents transplant shock from sudden exposure to wind, direct sun, and temperature fluctuations.
Start by placing seedlings outdoors in a sheltered, partially shaded spot for 1 to 2 hours on the first day. Increase outdoor time by 1 to 2 hours each day. By the end of the hardening period, they should be able to tolerate a full day of outdoor conditions.
Step 9 — Final Planting
Transplant seedlings into the garden or into their permanent containers after the last frost date in your region.
Spacing: In garden beds, space plants 12 to 18 inches apart in rows 24 to 30 inches apart. In containers, allow 6 to 8 inches between plants.
Planting depth: The crown of the plant — the junction between roots and leaves — must sit exactly at soil level. Planting too deep rots the crown. Planting too shallow exposes roots and dries them out. This is the single most important detail when transplanting strawberries.
Soil: Strawberries prefer well-drained, slightly acidic soil (pH 5.5 to 6.5). Amend heavy clay soils with compost and coarse sand before planting. In containers, use a high-quality potting mix amended with perlite.
Sunlight: A minimum of 6 to 8 hours of direct sunlight daily is required for productive fruiting. This is non-negotiable.
When Will Seed-Grown Strawberries Fruit?
This is the question everyone wants answered honestly. Seed-grown strawberries typically take one full growing season before producing a meaningful harvest. In the first year, it is common — and actually recommended — to remove flowers as they appear. This directs the plant’s energy into root development rather than fruiting, resulting in a stronger, more productive plant in the second year.
Everbearing and day-neutral varieties started from seed early in the season (January or February indoors) may produce a small harvest by late summer of their first year. Alpine strawberries are often productive by their first fall.
Method Two: Growing Strawberries from Runners
If seed-grown plants feel like too long a process, runners offer a faster alternative — and they are worth understanding alongside the seed method.
Runners are long, horizontal stems that mature strawberry plants send out naturally. At intervals along each runner, a small plantlet forms — a miniature version of the parent plant, complete with a cluster of leaves and developing roots.
Propagating from runners produces genetically identical copies of the parent plant. There is no variability. If the parent is a reliable producer with excellent flavor, every runner plant will be the same.
How to Propagate from Runners
- Identify a healthy, vigorous runner from a productive plant.
- Without cutting the runner from the parent, pin the plantlet to the soil using a small U-shaped wire pin, a hairpin, or a bent paper clip. You can pin it into a small pot of potting mix placed alongside the parent plant.
- Keep the soil moist where the plantlet is pinned. Roots will form within 3 to 4 weeks.
- Once the plantlet has developed a firm root system and is producing new leaves actively, sever the runner connecting it to the parent plant. Leave it in place for another week to reduce transplant stress.
- Transplant to its permanent location.
Runner-grown plants are typically ready to fruit the following growing season — faster than seed-grown plants in most cases.
Common Mistakes and How to Avoid Them
- Skipping cold stratification. The single most common reason seed-grown strawberries fail to germinate. Always stratify for at least three weeks.
- Covering seeds with soil. Strawberry seeds need light. Surface sow and press gently — do not bury.
- Overwatering seedlings. The growing medium should be moist, not wet. Consistently soggy conditions kill more seedlings than drought does.
- Planting in insufficient sunlight. Six to eight hours minimum. Fewer hours mean weak plants and little to no fruit.
- Burying the crown. Plant with the crown exactly at soil level. Check this carefully every time.
- Expecting first-year fruit. Remove flowers in the first season. It feels counterintuitive, but it pays off significantly in year two.
Frequently Asked Questions
Can I grow strawberries from a grocery store strawberry?
Yes, but results vary. Store-bought strawberries are usually hybrid varieties, and their offspring will be genetically variable. Some will be productive; others may not. For more consistent results, use seeds from open-pollinated varieties or purchase seed packets.
How long does it take to grow a strawberry plant from seed?
From seed sowing to transplant-ready seedling takes approximately 6 to 8 weeks. From transplant to first meaningful harvest typically takes one full growing season.
Do strawberry seeds need to dry before planting?
Yes. Allow extracted seeds to dry for 24 to 48 hours before stratifying or planting. Wet seeds are prone to mold during storage.
Can I skip the refrigerator step and just plant the seeds?
Technically yes, but germination rates will be significantly lower and the process will take much longer. Cold stratification is strongly recommended.
Is it better to grow strawberries from seed or runners?
Both methods work. Runners are faster and produce plants identical to the parent. Seeds take longer but allow you to grow from scratch, try new varieties, and start plants inexpensively in large quantities.
Suggested For You:
Understanding Types of Strawberries: Varieties, Flavors, and Which One to Grow
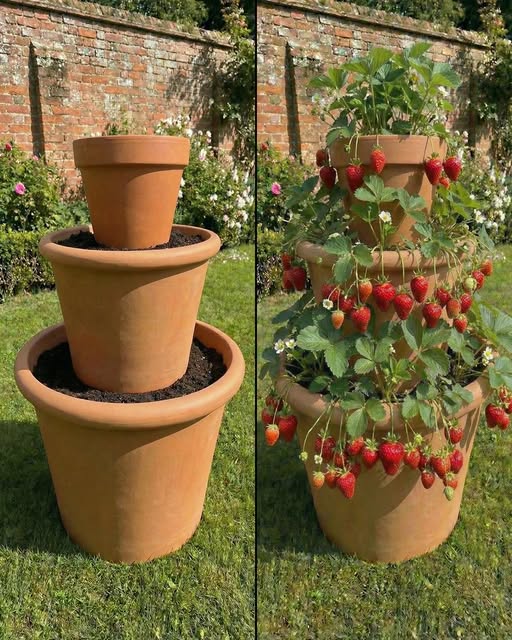
From Patio to Harvest: The Best Strawberry Pot Planting Ideas That Actually Work
15 Easy Vegetables to Plant and Harvest This Summer: Best Varieties That Grow Fast in Heat
Final Thoughts
Growing strawberries from a strawberry is not instant gratification. It asks for patience at several points — during stratification, during the long germination wait, and again during that first season when you remove the flowers to build a stronger plant. But each of those stages teaches you something.
By the time your seed-grown plants produce their first full harvest, you will understand the plant in a way that nursery-bought transplants never quite teach you. You will have watched it from its smallest beginning. And that first ripe berry — grown from nothing more than a seed scraped from a fruit on your kitchen counter — will taste like it was earned.
Start with alpine strawberries if you want the most reliable and rewarding experience. Stratify your seeds. Provide good light. Plant at the right depth. The rest follows naturally.
References
- Strand, L. L., & Gubler, W. D. (2020). Strawberry Pest Management Guidelines. University of California Agriculture and Natural Resources, UC IPM Online. https://ipm.ucanr.edu/PMG/selectnewpest.strawberries.html
- Poling, E. B. (1993). Strawberries. NC State Extension Publications, North Carolina State University. https://content.ces.ncsu.edu/strawberries
- Strik, B. C. (2006). Growing Strawberries in Your Home Garden. Oregon State University Extension Service Publication EC 1307. https://catalog.extension.oregonstate.edu/ec1307
- Heidenreich, C., Pritts, M., Kelly, M. J., & Demchak, K. (2012). High Tunnel Strawberry Production. Cornell University Cooperative Extension. https://www.fruit.cornell.edu/strawberry/
- Warmund, M. R. (2016). Strawberry Cultivars for Missouri. University of Missouri Extension, Publication G6135. https://extension.missouri.edu/publications/g6135
Tim M Dave is a gardening expert with a passion for houseplants, particularly cacti and succulents. With a degree in plant biology from the University of California, Berkeley, he has vast experience in gardening. Over the years, he has cultivated a vast collection of desert plants and learned a great deal about how to grow and care for these unique companions.