Boston Fern History: Care and Tips for Growing Sword Fern Indoors
The Boston fern’s fame coincided with the Victorian era’s fern craze, or “pteridomania,” when ferns were a symbol of elegance and sophistication. Wealthy households displayed them in ornate parlors and conservatories, and the Boston fern’s easygoing nature made it a standout.
Native to tropical regions of Central and South America, the Caribbean, and parts of Africa, the Nephrolepis exaltata species has thrived in humid, shaded environments for centuries.
In the late 19th century, specifically around 1894, a unique fern caught the eye of horticulturists in a shipment sent from Philadelphia to Boston, Massachusetts. Unlike the upright fronds of its parent, the sword this mutant had softer, drooping fronds that gave it a lush, cascading appearance.
Botanists named it Nephrolepis exaltata ‘Bostoniensis’, and it quickly became a sensation. By the early 20th century, the Boston fern had cemented its place as a decorative staple. Its versatility allowed it to thrive in homes without the advanced heating or lighting systems we have today.
Fast forward to 2025, and the Boston fern remains a darling of interior designers and plant enthusiasts alike. Whether hung in a macramé basket or perched on a shelf, its timeless appeal continues to captivate.
For me, learning about its history made me appreciate my fern even more. It’s like caring for a piece of living history.
Characteristics of the Boston Fern
What makes the Boston fern so irresistible? Let’s break down its defining traits
Appearance: The Boston fern is known for its long, arching fronds that can stretch up to 3-4 feet in ideal conditions. Each frond is composed of tiny leaflets called pinnae, which give the plant its signature feathery texture. When healthy, the fronds are a vibrant green in color.
Growth habit: In the wild, Boston ferns are epiphytic, meaning they grow on other plants or surfaces, absorbing moisture and nutrients from the air. Indoors, they’re typically potted in soil or displayed in baskets, where their fronds cascade like a green waterfall.
Size:The fronds of the Boston Fern are 50–250 centimetres (20–98 in) long and 6–15 centimetres (2.4–5.9 in) broad, with alternate pinnae (the small “leaflets” on either side of the midrib), each pinna being 2–8 centimetres (0.79–3.15 in) long.
Versatility: Boston ferns adapt to various settings—indoors, outdoors in shaded areas, or even in terrariums (though they can outgrow small spaces). I’ve experimented with mine in different spots, from my bathroom to my patio, and it thrived with the right care.
Toxicity: As a pet owner, I was thrilled to learn that Boston ferns are safe for cats and dogs. The ASPCA confirms they’re non-toxic, so I don’t worry when my curious cat sniffs around.
Air-purifying qualities: One of my favorite facts about Boston ferns is their ability to clean the air. NASA’s Clean Air Study, conducted in the 1980s, found that they help remove indoor pollutants like formaldehyde and benzene.
Comprehensive Care Guide for Boston Ferns
The Boston fern’s combination of beauty and functionality makes it a plant that’s hard to resist. My first fern taught me that neglect leads to crispy fronds and a sad plant. But to keep those fronds lush, you need to understand their care requirements.
Below, I’ll share everything I’ve learned to help you grow a thriving fern, with tips backed by experts and my own experience.
Light: Bright, Indirect, and Just Right
Boston ferns crave bright, filtered light. Think of the dappled sunlight they’d get under a jungle canopy. Direct sun is their enemy; it burns the fronds, leaving them brown and brittle. I keep my fern near a north-facing window, where it gets soft, indirect light all day.
I once placed my fern in a sunny south-facing window, thinking more light equaled more growth. Big mistake! The fronds turned yellow within days. Moving it to a shadier spot revived it. So, if you notice yellowing or fading fronds, check the light exposure.
Sheer curtains can diffuse harsh sunlight, creating the perfect environment. If your home lacks natural light, a grow light can work wonders. Experts suggests 12-16 hours of light daily for optimal growth.
Water: Moist but Never Soggy
Boston ferns love consistently moist soil, but they don’t tolerate waterlogging. I water mine when the top inch of soil feels dry, usually every 4-5 days in summer and once a week in winter. Use lukewarm water to avoid shocking the roots, and ensure your pot has drainage holes to prevent root rot.
Pro Trick: I use a moisture meter to check the soil, especially when I’m unsure. It’s saved me from overwatering disasters. Brown, crispy frond tips often signal underwatering. If this happens, increase watering frequency and check humidity levels.
Humidity: A Tropical Must-Have
Humidity is where Boston ferns get picky. They thrive in 50-80% humidity. This range can be challenging in dry homes, especially during winter. I keep a humidifier near my fern, set to 60%, and it’s made a world of difference.
Alternatively, you can mist the fronds daily. The easiest way is to place the pot on a tray of pebbles filled with water (keeping the pot above the waterline), or group it with other plants to create a humid microclimate. The Missouri Botanical Garden emphasizes humidity as a key factor in fern health.
If the fronds are browning or dropping, low humidity is often the culprit. A hygrometer can help you monitor levels.
My Hack: I occasionally bring my fern into the bathroom during showers. The steam gives it a quick humidity boost, and it seems to love the spa treatment!
Soil: Rich and Well-Draining
Boston ferns need loose, well-draining soil that retains moisture without staying soggy. I use a mix of 50% peat moss, 25% perlite, and 25% potting soil for mine. This combo provides the right balance of moisture retention and drainage.
You can also buy a pre-made potting mix for houseplants and add some organic matter like compost for extra nutrients. Repot your fern every 1-2 years to refresh the soil and give the roots room to grow.
Be sure to choose a pot with drainage holes. I learned the hard way that decorative pots without drainage can lead to root rot.
Temperature: Warm and Stable
Boston ferns prefer temperatures between 65-75°F (18-24°C) during the day, with slightly cooler nights (around 55-65°F). They’re sensitive to cold drafts, so keep them away from windows or air vents in winter. I once left my fern near a drafty door, and it dropped fronds like crazy until I relocated it.
In USDA zones 9-11, Boston ferns can live outside year-round in shaded areas. I bring mine out in summer, but I’m careful to protect it from wind and direct sun. Temperatures below 55°F (13°C) can stress the plant, leading to frond loss. If you see this, check for drafts or cold spots.
Fertilizer: Less Is More
Boston ferns aren’t heavy feeders. I fertilize mine with a diluted liquid houseplant fertilizer (like a 10-10-10 or 20-20-20 formula) every 4-6 weeks during spring and summer. In fall and winter, skip feeding since growth slows. Over-fertilizing can burn the roots.
Always dilute the fertilizer to half the recommended strength to be safe. I mix mine in a watering can for even application.
Pruning: Keep It Neat and Healthy
Dead or yellowing fronds are a normal part of a fern’s life cycle. I trim them off at the base with clean, sharp scissors to keep my plant looking tidy. Pruning also encourages new growth, improves air circulation, and reduces the risk of pests or disease. Don’t be shy about cutting back.
My Routine: I check for dead fronds every couple of weeks, especially in winter when growth slows. It’s like giving my fern a haircut!
Propagation: Multiply Your Fern Family
One of the joys of growing a Boston fern is sharing it with others. Propagation is surprisingly easy. I’ve divided my fern a few times to create new plants for friends. Here’s how I do it:
- Gently remove the fern from its pot.
- Shake off excess soil to expose the root ball.
- Use a clean knife to divide the root ball into smaller sections, ensuring each has fronds and roots.
- Plant each section in a pot with fresh, well-draining soil.
- Keep the new plants in a humid, shaded spot and water regularly until they establish.
My Tip: Be patient with new divisions. It took mine about a month to show new growth, but now they’re thriving.
Pest Control: Stay Vigilant
Boston ferns are relatively pest-resistant, but they can attract spider mites, mealybugs, and scale, especially in dry conditions. I’ve dealt with spider mites on mine, which left tiny webs and speckled fronds. Wiping the fronds with a damp cloth or using neem oil fixed the issue.
High humidity and regular misting deter pests. I also inspect my fern weekly for signs of trouble. If pests appear, isolate the plant to prevent spreading and treat promptly with insecticidal soap or neem oil.
Troubleshooting Common Problems
Even with the best care, Boston ferns can have off days. Here are issues I’ve encountered and how to fix them:
- Yellowing fronds: This usually means too much sun or underwatering. Move the fern to a shadier spot and check soil moisture. I once fixed a yellowing fern by relocating it to a bathroom with filtered light.
- Brown, crispy tips: Low humidity or inconsistent watering is often the cause. Increase humidity with a humidifier or pebble tray, and water more regularly.
- Frond drop: Cold drafts, overwatering, or low humidity can trigger this. Check the plant’s environment and adjust. My fern dropped fronds near an air vent until I moved it.
- Slow growth: Could be due to poor soil, insufficient light, or lack of nutrients. Repot with fresh soil, ensure proper light, and fertilize lightly during the growing season.
- Pests: Spider mites, mealybugs, or scale can sneak in. Inspect regularly and treat with neem oil or insecticidal soap. I caught spider mites early by checking the undersides of fronds.
Advanced Tips for Boston Fern
Once you’ve mastered the basics, here are some advanced tips I’ve picked up to take your Boston fern game to the next level:
- Ferns respond to seasonal changes. In winter, reduce watering and skip fertilizing since growth slows. In spring, ramp up care to encourage new fronds.
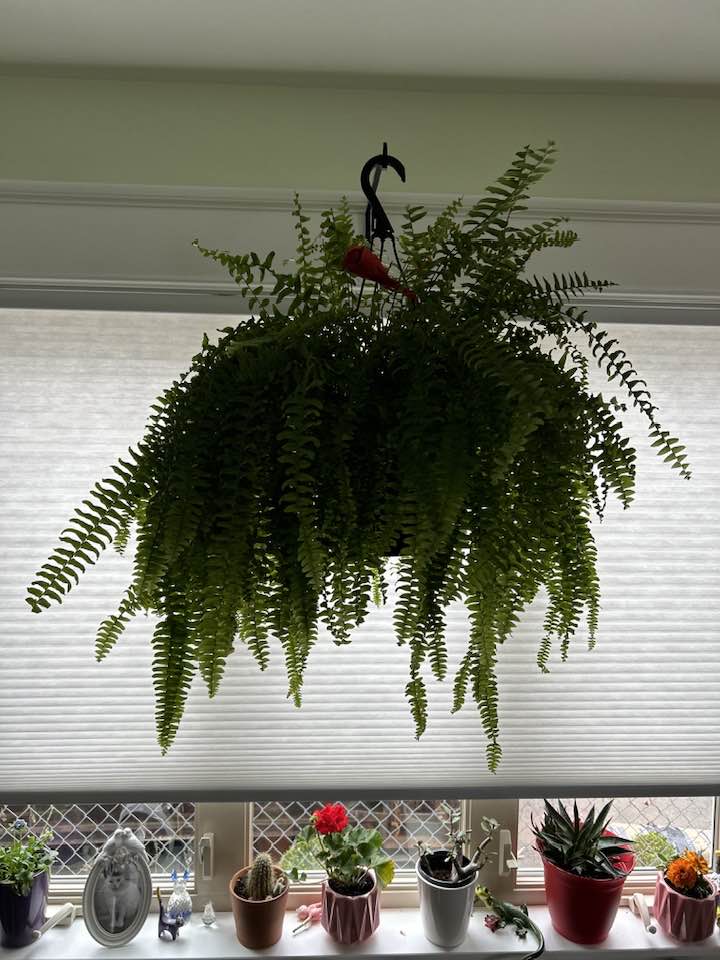
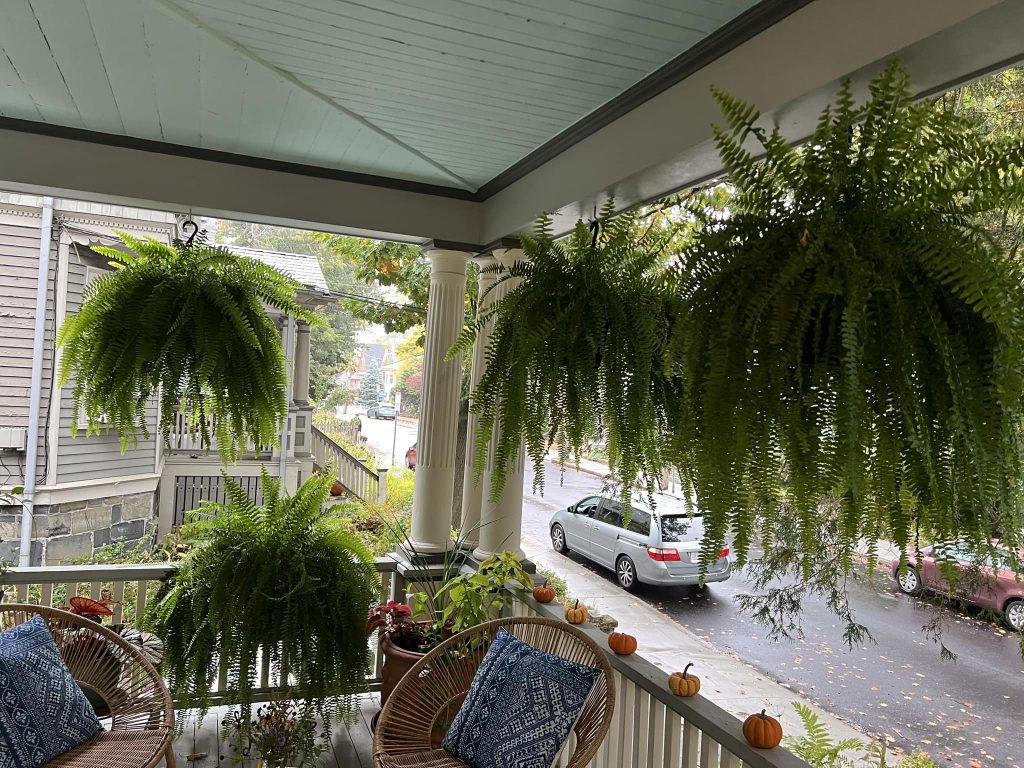
- Boston ferns shine in hanging baskets, where their fronds can cascade freely. Mine hangs in a macramé basket near a window, adding a cozy, boho touch.
- In summer, you can move your fern outdoors to a shaded spot. The fresh air and natural humidity give it a boost. Remember to bring it indoors before temperatures drop below 55°F.
- Dust can build up on fronds, blocking light. Gently rinse with lukewarm water every few months to keep them vibrant.
- You can group your fern with other humidity-loving plants like pothos or peace lilies. They create a mini rainforest vibe and help each other thrive.
FAQs
Here are answers to frequently asked questions about growing Boston ferns
Q: How often should I water my Boston fern?
A: Water when the top inch of soil feels dry, typically every 4-7 days. Adjust based on your climate and season. I check mine twice a week in summer.
Q: Can Boston ferns grow outdoors?
A: Yes, in USDA zones 9-11, they thrive in shaded, humid areas. I bring mine outside in summer but protect it from direct sun and wind.
Q: Why is my Boston fern turning brown?
A: Brown fronds often indicate low humidity, underwatering, or too much sun. Increase humidity, check watering, and move to a shadier spot.
Q: Are Boston ferns safe for pets?
A: Absolutely! The ASPCA confirms they’re non-toxic to cats and dogs.
Q: How do I revive a dying Boston fern?
A: Trim dead fronds, increase humidity, ensure proper watering, and provide bright indirect light. Patience is key—my fern took weeks to recover after a rough patch.
Q: Can I grow a Boston fern in low light?
A: They tolerate low light better than most plants but prefer bright indirect light. In low light, growth may slow, and fronds may thin out. A grow light can help.
Q: How do I propagate my Boston fern?
A: Divide the root ball into smaller sections with fronds and roots, then replant in fresh soil. Keep new plants humid and shaded until established.
Final thoughts
When I got my first Boston fern, I was a plant novice with big dreams and little knowledge. I plopped it in a sunny corner, watered it whenever I remembered, and expected it to thrive. The fronds turned crispy, and I was convinced I had a black thumb.
But after diving into research and talking to fellow plant lovers, I learned its needs—bright indirect light, consistent moisture, and lots of humidity. Now, my fern is the star of my living room, cascading from a hanging basket like a green waterfall.
Caring for it has become a calming ritual, a moment to slow down and connect with nature. Every new frond feels like a small victory, and I’m hooked on the fern life.
Helpful Resources
- Missouri Botanical Garden: Nephrolepis exaltata
- ASPCA: Non-Toxic Plants
- Royal Horticultural Society: Fern Care Guide
Tim M Dave is a gardening expert with a passion for houseplants, particularly cacti and succulents. With a degree in plant biology from the University of California, Berkeley, he has vast experience in gardening. Over the years, he has cultivated a vast collection of desert plants and learned a great deal about how to grow and care for these unique companions.