Black Spots on Roses: What’s Really Causing Them
If you grow roses, there is a good chance you have faced this moment — you step outside to check on your garden, and there they are. Small, dark circles spreading across the leaves. Some leaves are already yellowing around the spots. A few have dropped to the ground entirely. The bush that looked so promising a few weeks ago now looks like it is struggling to survive.
Black spots on roses are frustrating. But they are also one of the most well-understood problems in all of home gardening. Once you know what you are dealing with and why it happens, you can treat it effectively and — better yet — prevent it from coming back.
This guide covers everything you need to know: what black spot disease is, what causes it, how to identify it correctly, how to treat it, and the ideal growing conditions that give your roses the best defense against it and other problems.
What Are Black Spots on Roses?
When most gardeners talk about black spots on roses, they are referring to black spot disease — a fungal infection caused by the pathogen Diplocarpon rosae. It is the single most common and destructive disease affecting roses worldwide.
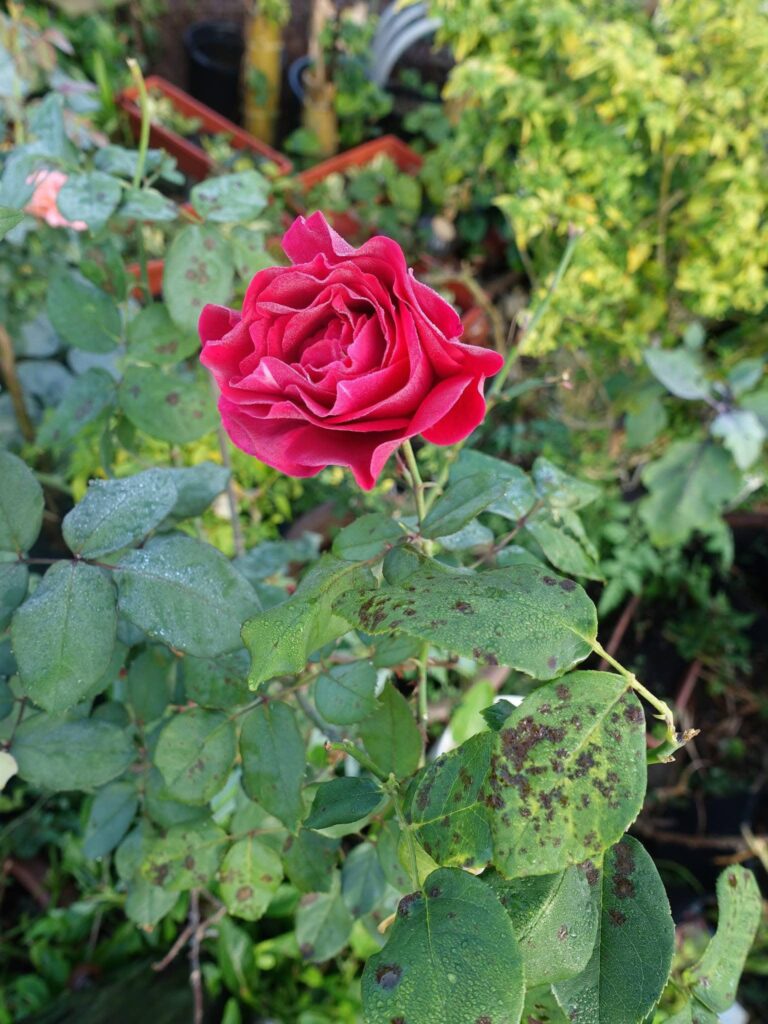
The disease earns its name from the circular, dark spots it produces on the upper surface of rose leaves. These spots are not merely cosmetic. They signal an active fungal infection that, if left untreated, will spread across the entire plant, strip it of its foliage, weaken it significantly, and reduce both its blooming capacity and its ability to survive winter.
I have spoken with rose growers who lost entire established plants to black spot over successive seasons — not because the disease was untreatable, but because it was misidentified or ignored too long. Early recognition is everything.

How to Identify Black Spot Disease
Before treating any problem on your roses, it pays to be certain of what you are dealing with. Black spot has some clear, recognizable characteristics that distinguish it from other rose diseases and issues.
The classic symptoms of black spot include:
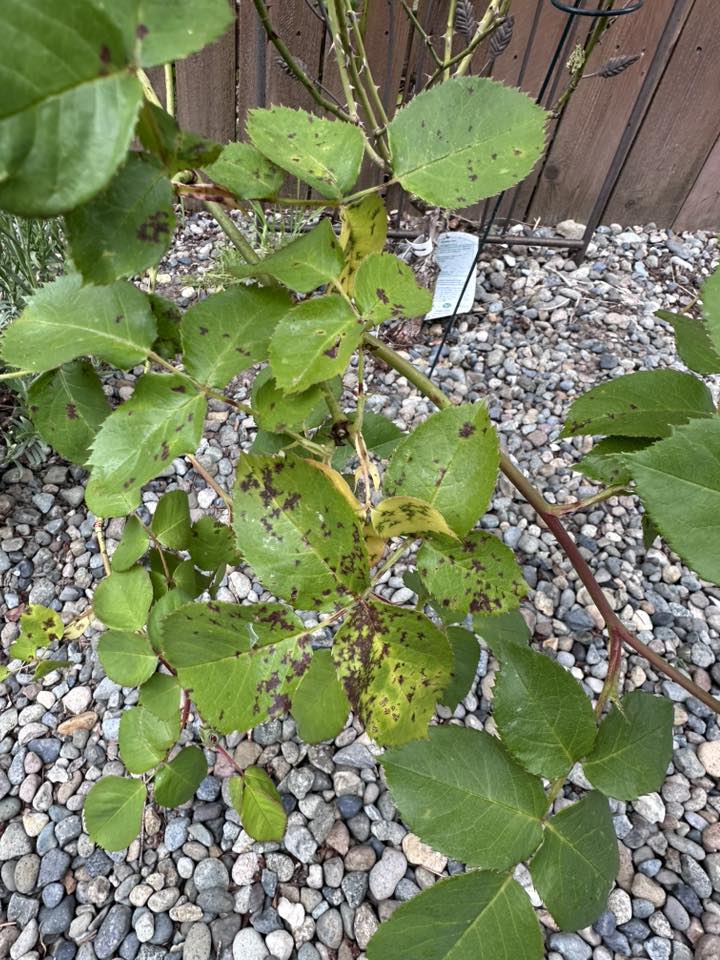
- Circular black or dark brown spots on the upper surface of leaves, typically ranging from 3 to 15 millimeters in diameter
- Spots with irregular, fringed or feathery edges — not perfectly smooth — which distinguishes black spot from some other fungal diseases
- Yellow halos surrounding the spots, as infected leaf tissue breaks down
- Premature yellowing of the entire leaf, followed by leaf drop
- Infection appearing first on lower leaves and progressing upward through the plant
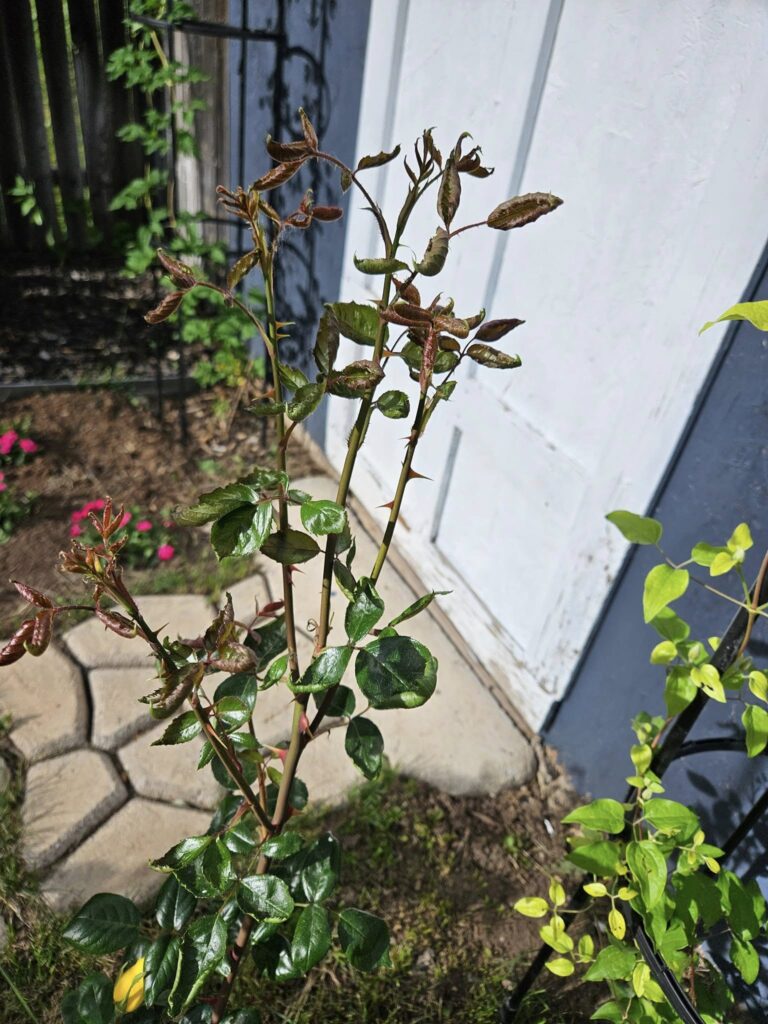
- In severe cases, spots also appearing on young canes and stems, causing reddish-purple blotches or lesions
The fungus does not infect flowers directly, though a heavily defoliated plant will produce fewer and poorer-quality blooms as a consequence of the ongoing stress.
One important distinction: black spot spots are always on the upper surface of the leaf. Downy mildew — another fungal disease — produces grayish growth primarily on the undersides of leaves. This difference matters when selecting appropriate treatment.
What Causes Black Spot on Roses?
Understanding the conditions that allow black spot to develop is essential for both treatment and prevention.
Moisture Is the Trigger
Black spot requires moisture to spread. The fungal spores, called conidia, are produced within the black spots on infected leaves. They are released and carried by water — rain splash, overhead irrigation, or even heavy dew — to healthy leaves where they germinate and begin a new infection cycle.
Germination requires leaf surfaces to remain wet for as little as 7 hours at temperatures between 64°F and 75°F (18°C to 24°C). This is why black spot is worst during cool, wet spring and summer weather. A few rainy days in a row can trigger an outbreak on previously healthy plants.
Spores Survive the Winter
One of the reasons black spot is so persistent is that the fungus overwinters on infected fallen leaves and on canes that carry lesions from the previous season. When spring rains arrive, these overwintered spores become active again and begin reinfecting the plant from the ground up.
This is why clean-up practices in autumn are so critical — not just for aesthetics, but as a direct disease management strategy.
Susceptible Varieties
Not all roses are equally vulnerable. Hybrid tea roses, grandifloras, and many modern large-flowered varieties are highly susceptible to black spot because they were bred primarily for flower form and color rather than disease resistance.
Many old garden roses, rugosa roses, and newer disease-resistant varieties bred specifically with resistance offer far better natural protection.
The Disease Cycle: Why Black Spot Keeps Coming Back
Many gardeners treat black spot, see improvement, and then watch it return the following year — or even later in the same season. This happens because of the fungus’s efficient reproduction cycle.
A single infected leaf can produce thousands of spores. Each infection cycle — from initial spore contact to new visible spots — takes approximately 3 to 16 days depending on temperature and moisture levels. This means that under favorable conditions, the disease can cycle through the plant multiple times in a single growing season.
This is why a single treatment is rarely sufficient. Black spot management requires a consistent, repeated approach throughout the season, not a one-time intervention.
How to Treat Black Spot on Roses
Step 1: Remove Infected Material Immediately
The first action when you notice black spot is physical removal. Pick off every infected leaf you can see — even those that are only partially spotted — and collect all fallen leaves from the ground. Place them in sealed bags and dispose of them in the trash. Do not compost infected material, as compost piles do not reliably reach the temperatures needed to kill fungal spores.
This will not eliminate the disease on its own, but it dramatically reduces the number of active spores available to reinfect the plant and its neighbors.
Step 2: Apply a Fungicide
Fungicide treatment is the cornerstone of black spot management. There are both conventional and organic options available.
Conventional fungicides with active ingredients such as myclobutanil, trifloxystrobin, or tebuconazole are highly effective against black spot and provide good residual protection. These are available under various brand names at garden centers. Always follow label instructions for dilution rate, application frequency, and safety precautions.
Organic and lower-toxicity options include:
- Neem oil — a naturally derived oil that disrupts fungal growth and also has some insecticidal properties. It must be applied preventively and regularly to be effective.
- Copper-based fungicides — copper fungicides have been used in horticulture for over a century and are effective against a broad range of fungal and bacterial diseases, including black spot.
- Potassium bicarbonate — raises the pH on the leaf surface, creating conditions unfavorable for fungal germination. It is a contact treatment rather than a systemic one.
- Sulfur-based fungicides — effective preventively but should not be applied in hot weather (above 90°F/32°C) or when temperatures will reach that level within a few days, as sulfur can burn foliage under heat stress.
Key principle: fungicides protect healthy tissue but cannot cure already-infected leaves. This means applications must begin before or at the very first signs of infection, and must be repeated regularly — typically every 7 to 14 days — to protect new growth as the season progresses.
Step 3: Rotate Fungicide Classes
If you use the same fungicide repeatedly, the fungal population can develop resistance. This is not hypothetical — resistance to certain fungicide groups has been documented in Diplocarpon rosae populations. To reduce this risk, alternate between fungicides with different active ingredients or modes of action throughout the season.
Step 4: Treat the Canes in Autumn
At the end of the growing season, after leaves have dropped, spray the bare canes with a copper-based fungicide or a lime-sulfur dormant spray. This targets overwintering spores on the canes and helps break the disease cycle before the following spring.
Other Causes of Black or Dark Spots on Roses
Not every dark mark on a rose leaf is caused by Diplocarpon rosae. It is worth knowing the alternatives.
Downy Mildew
Downy mildew (Peronospora sparsa) can cause dark, angular patches on the upper surface of rose leaves, along with a grayish-white downy growth on the undersides. It tends to develop in cooler, more humid conditions than black spot and spreads rapidly.
Treatment involves copper-based or phosphonate fungicides and improved air circulation.
Rose Anthracnose
Anthracnose on roses produces small, circular spots with lighter tan or white centers and darker borders. It is caused by fungi in the Sphaceloma genus. Like black spot, it spreads through water splash and infected debris. Management is similar: removal of infected material and regular fungicide applications.
Thrips Feeding Damage
Thrips are tiny insects that feed on rose petals and leaves, leaving dark streaks or spots behind. The damage from thrips tends to be irregular rather than circular, and the leaf discoloration is often silvery or bronze rather than black. Close inspection will reveal the small, slender insects themselves.
Rose Slug Sawfly
Rose slug sawfly larvae skeletonize the underside of rose leaves, leaving the upper surface with a windowed, translucent appearance that eventually dries and turns dark. The damage is linear and irregular, quite different from the circular spots of black spot disease.
Pesticide or Spray Burn
Applying pesticides or fertilizers in hot weather, or at incorrect concentrations, can cause chemical burn — dark or brown spots with dry, crispy texture. These spots do not spread, which distinguishes them from fungal infections.
Preventing Black Spot: Long-Term Strategies
Treatment manages the disease once it appears. Prevention minimizes how often and how severely it appears. The two work together.
Choose Resistant Varieties
This is the single most effective long-term strategy. Disease-resistant rose varieties have been developed that carry natural genetic resistance to black spot and other fungal diseases. Look for varieties labeled as disease-resistant when purchasing, or seek out ratings from organizations such as the American Rose Society.
Some well-regarded disease-resistant rose categories include:
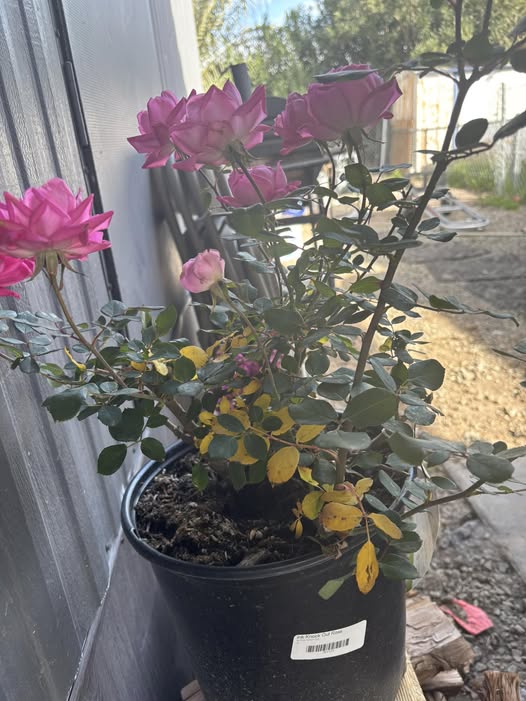
- Knock Out rose series
- Carefree Beauty™ and Carefree Wonder™
- Many rugosa rose (Rosa rugosa) varieties
- Earth-Kind roses tested through university trials
No variety is completely immune — but resistant varieties significantly reduce the frequency and severity of infection, and may require no fungicide treatment at all in many climates.
Improve Air Circulation
Fungal diseases flourish where air movement is limited. Dense planting, excessive leafy growth inside the bush, and placement near walls or fences that block airflow all create the humid microclimates that black spot loves.
Prune roses annually to maintain an open, vase-shaped form with good airflow through the center. Space plants generously — at least 3 to 4 feet apart for most varieties — when planting. Avoid planting in corners or against walls where air stagnates.
Water at the Base
Never water roses from overhead if you can help it. Overhead watering wets the foliage and creates the exact leaf surface moisture that black spot spores need to germinate. Instead, use a drip irrigation system, soaker hose, or water directly at the base of the plant.
If overhead watering is unavoidable, do it in the morning so that foliage dries before evening temperatures cause moisture to linger overnight.
Clean Up Thoroughly in Autumn
Autumn clean-up is a critical disease prevention step that is easy to do and highly effective. Remove all fallen leaves from around the base of the plant, rake the surrounding soil surface, and dispose of the debris rather than composting it. Cutting off and removing any canes showing dark lesions reduces the overwintering fungal reservoir further.
Apply a fresh layer of mulch in autumn to cover any remaining spores in the soil surface and reduce soil splash onto lower leaves the following spring.
Mulch Year-Round
A 2 to 3-inch layer of organic mulch around the base of each rose plant is one of the simplest and most effective cultural practices available to rose growers. Mulch suppresses the soil splash that carries black spot spores from infected soil and debris onto the lower leaves — physically interrupting the disease cycle at ground level.
Use shredded bark, wood chips, or compost as mulch. Keep it a few inches away from the main stem to prevent moisture accumulation against the cane bases.
The Right Growing Conditions for Healthy Roses
A rose growing under ideal conditions has a stronger immune response and recovers from disease pressure more quickly than a stressed, struggling plant. These are the fundamentals every rose needs.
Full Sun: At Least Six Hours Daily
Roses are among the most sun-demanding of all flowering garden plants. They need a minimum of six hours of direct sunlight per day, and eight is better. Full sun keeps foliage dry, supports vigorous growth, and produces the best flower color and fragrance.
Shaded roses not only bloom poorly — they are also more prone to fungal disease because their foliage takes longer to dry after rain or irrigation.
Well-Drained, Fertile Soil
Roses need loamy, well-draining soil with a pH of 6.0 to 6.5. They struggle in heavy clay that retains water, and in sandy soils that drain too quickly and hold few nutrients. In both cases, incorporating generous amounts of organic matter — compost, aged manure, or leaf mold — improves soil structure, drainage, and fertility simultaneously.
A soil test before planting is one of the best investments a rose grower can make. It identifies pH imbalances and nutrient deficiencies before they cause problems.
Deep, Infrequent Watering
Water deeply, at the base of the plant, once or twice a week rather than frequent shallow sessions. Deep watering pushes roots downward, making plants more drought-tolerant. Shallow watering keeps roots near the surface, where they are vulnerable to heat, drought, and compaction.
The goal is to moisten the soil to a depth of at least 12 to 18 inches with each watering session. A thorough soak followed by a period of relative dryness is far better than a little water every day.
Regular Fertilization
During the growing season, feed roses every four to six weeks with a balanced fertilizer formulated for roses or a general-purpose fertilizer with roughly equal parts nitrogen, phosphorus, and potassium. Begin fertilizing in early spring when new growth emerges and stop six to eight weeks before the expected first frost.
Excess nitrogen encourages the kind of lush, soft growth that is particularly attractive to aphids and other pests, and which also tends to be more susceptible to fungal infection. Balanced nutrition — including micronutrients — supports steady, resilient growth.
Annual Pruning
Annual pruning serves multiple purposes. It removes dead and diseased wood, opens the canopy to light and airflow, stimulates vigorous new growth, and maintains the plant in an attractive, manageable form.
Prune in early spring when buds begin to swell, using clean, sharp tools disinfected between cuts.
Cut back to healthy, white-centered wood. Remove any canes that cross through the center of the plant and any that show signs of disease or physical damage.
Suggested For You:
Why Are the Leaves on My Rose Bush Turning Yellow? (Causes and Solutions)
Your Rose Leaves Are Curling — And the Reason Is Closer Than You Think
Those Dark Spots on Your Rose Leaves Are Telling You Something — Here Is How to Listen
Dividing Hostas: When and How to Split Your Plantain lilies
15 Best Flowers for Pollinators: (Bees, Butterflies, Moths, Hummingbirds and More)
Final Thoughts
Black spot on roses is genuinely one of the most persistent challenges in the rose garden — but it is not an unbeatable one. Successful management comes from combining prompt treatment with consistent prevention and strong cultural practices. No single step solves the problem alone. It is the combination that works.
If you have been fighting black spot for years without lasting success, consider whether your rose varieties might be part of the equation. Switching to disease-resistant cultivars, even gradually, can transform the amount of time and effort you spend on disease management — and let you enjoy your roses more than you fight for them.
With attention, the right tools, and an understanding of how this disease operates, you can grow beautiful, healthy roses that light up your garden from spring through autumn.
References
- Clemson University Cooperative Extension — Black Spot of Rose https://hgic.clemson.edu/factsheet/black-spot-of-rose/
- University of California Agriculture and Natural Resources (UC IPM) — Black Spot: Rose Diseases https://ipm.ucanr.edu/PMG/GARDEN/PLANTS/DISEASES/blackspot.html
- Penn State Extension — Black Spot of Rose https://extension.psu.edu/black-spot-of-rose
- University of Minnesota Extension — Roses: Diseases and Cultural Problems https://extension.umn.edu/plant-diseases/rose-diseases
- Texas A&M AgriLife Extension — Earth-Kind® Rose Program and Disease Resistance https://earthkindlandscaping.tamu.edu/roses/
Tim M Dave is a gardening expert with a passion for houseplants, particularly cacti and succulents. With a degree in plant biology from the University of California, Berkeley, he has vast experience in gardening. Over the years, he has cultivated a vast collection of desert plants and learned a great deal about how to grow and care for these unique companions.